Adding a camera to your 3d printer using Crowsnest
(and of course Klipper!)

Klipper firmware has a great deal of benefits for all its users. It offers fast printing, precise printing, and the ability to control your 3d printer remotely. However it’s the last part, remote control, that we don’t have total access too from the start. We have the ability to affect and control our printers yes, but what about watching them? Can we tell if a print has gone south and needs to be stopped? Can we tell if a print has finished and a new one can be started? Well, yes you can, but you’d need to be right in front of your printer. What this article is offering is the ability to do all the above mentioned tasks, but while you’re sitting on the comfort of your couch. Which means you will be adding a camera to your 3d printer setup, and in doing so break some of the (metaphorical) chains that are binding you to the printer. You will be able to view your printer, and more importantly your on-going prints, from anywhere that you can open a local webpage. While this seems like a cherry on top scenario for some this can be the difference between staying in this hobby or not for others. Mobility and location challenges can be a major barrier of entry for many people, and by adding a webcam to monitor your 3d printer you limit the amount of trips you need to take to your 3d printer. So if you while this may not affect you, if you have friends or family that are considering 3d printing, but are worried about the amount of travel that is needed to check-in on their 3d printers, let them know there is an easy solution to watching it remotely, and it’s called CrowsNest! (…also Klipper firmware)
*Crowsnest is available for the front ends Fluidd & Mainsail
Chapters
-Install crowsnest
-Did crownest config file get created?
-File crownest.conf DID NOT get created
-SSH using WinSCP
-Who will this affect?
-The Fix
-Creating the configuration file
-Crowsnest Configuration
-Adding the camera viewer to the Home Screen
*Affiliate links*

Install CrowsNest
For this installation you will need to power on your 3d printer and the Klipper host-device and they will need to be connected(usually a raspberry pi or Inovato Quadra). We will be accessing files on the host-device by using SSH, which I have covered in a few other videos/articles. We begin by SSH’ing into your MCU and I usually prefer to use the service PuTTY
*Keep in mind most all of this information can be found at CrowsNest github
On your PC open up the software PuTTY and SSH into your MCU
PuTTy is free to download software for PCs that allows us to access devices remotely
If you’re running Windows, newer versions now come equipped with the ability to SSH directly from the command line.
When PuTTY opens input the ip address or hostname.local address of your MCU and connect to it
The ip address is the same address you use to access Klipper from a webpage
When prompted enter the username and password of your device, and once input you’ll be brought to the terminal line of the device
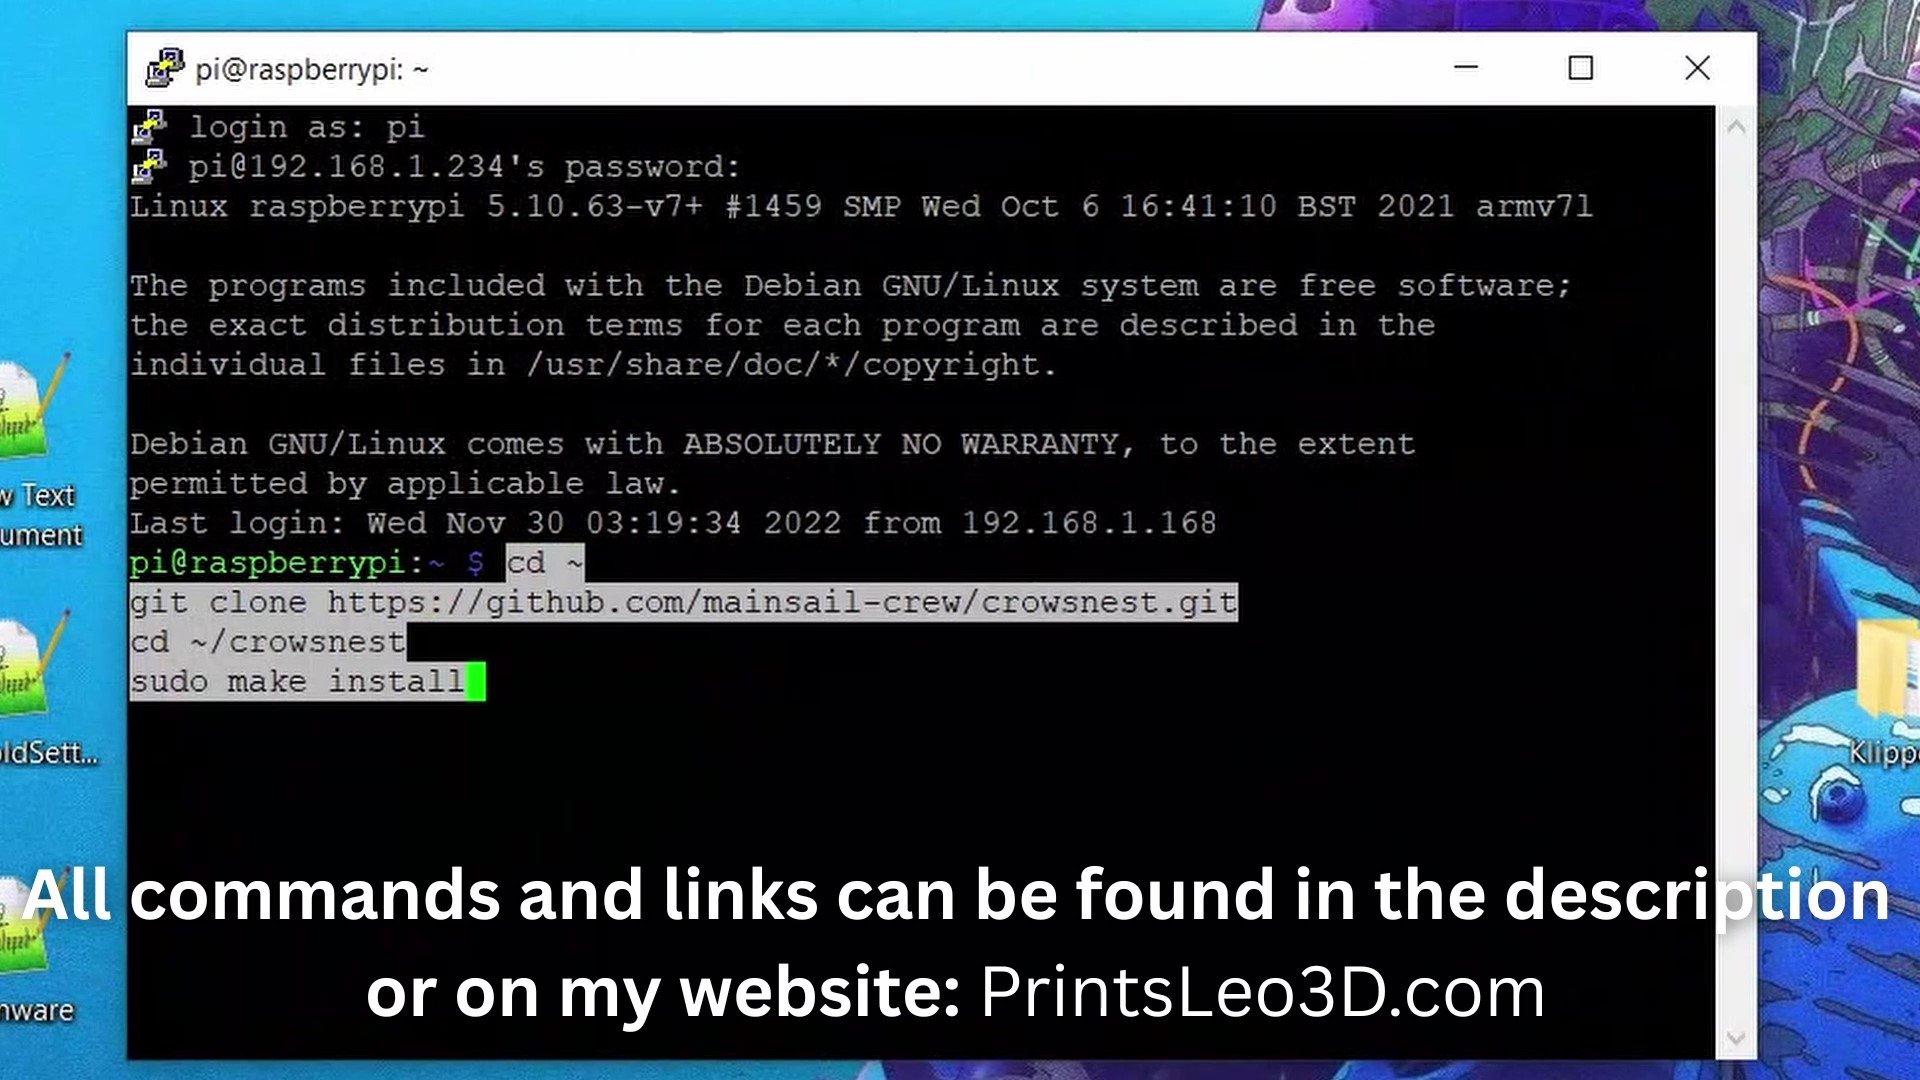
At the terminal line input this block of command as one section and hit enter
cd ~
git clone https://github.com/mainsail-crew/crowsnest.git
cd ~/crowsnest
sudo make install
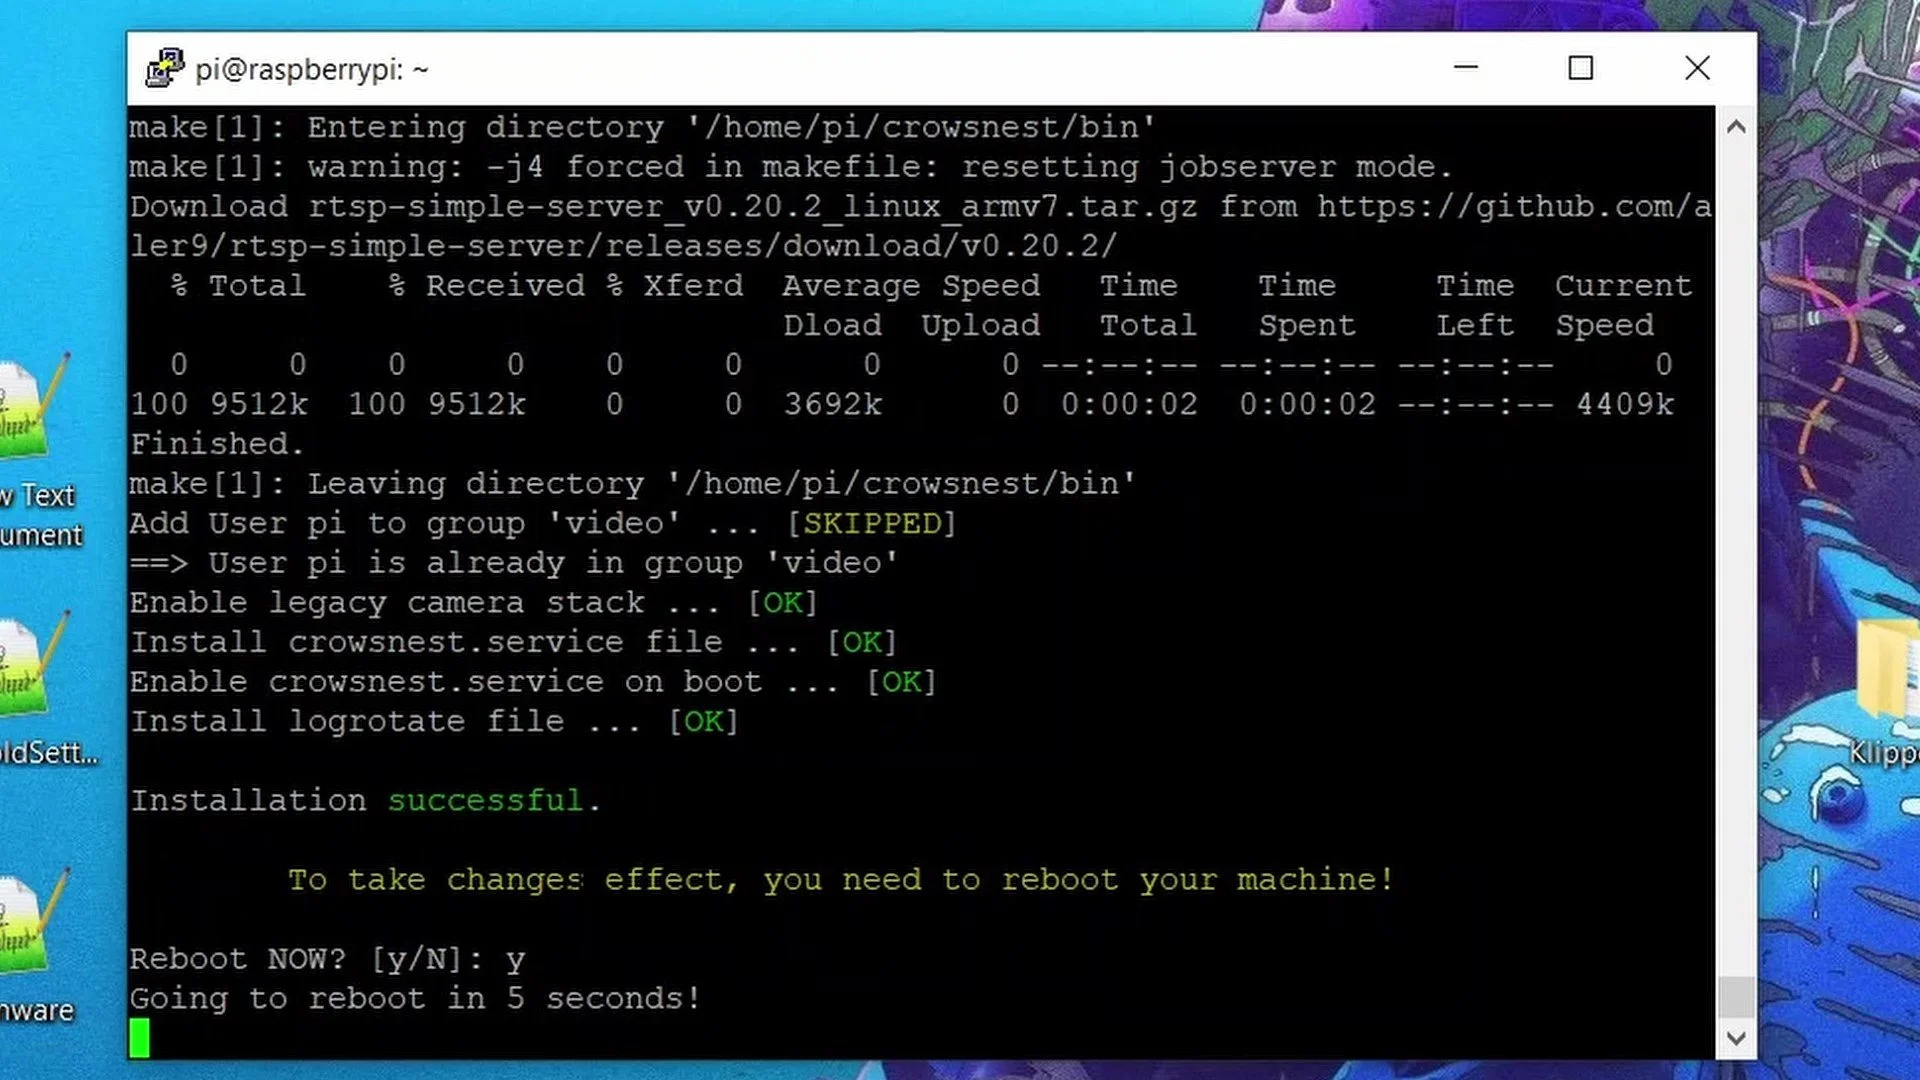
The above command will clone the github repository of Crows Nest and a download will begin
Once the download is finished you will be given the option to reboot, you must reboot for Crowsnest to start, so select the option to reboot. Then close the Putty terminal.
Did CrowsNest config file get created?
After the host device reboots Crowsnest is now installed and operable! Open a new webpage and access your 3d printer from your front end(Fluidd or mainsail) to continue configurating your webcam.
Inside your front end navigate to the Configurations menu and look for the following file
‘crowsnest.conf’
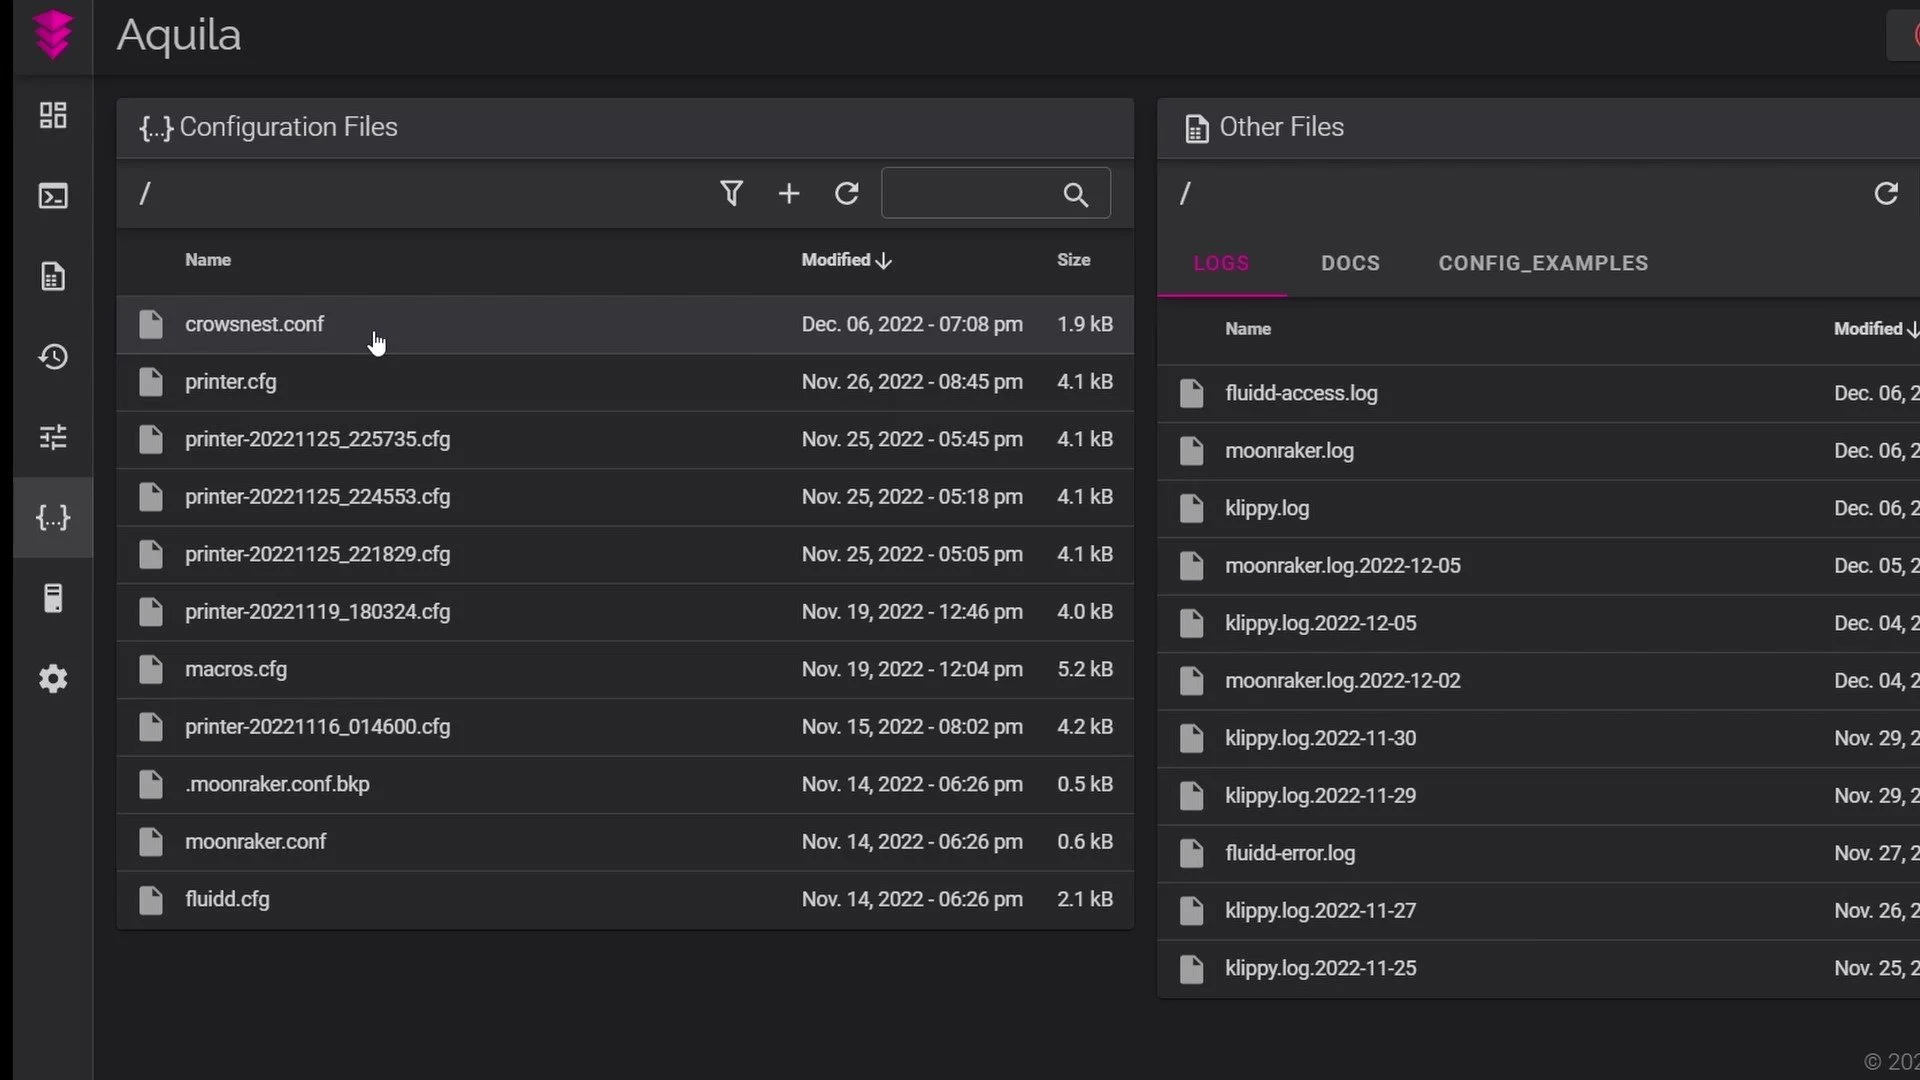
If the file crowsnest.conf has populated inside the Configuration page, skip to the section titled Crowsnest Configuration
OR
If the file crowsnest.conf did not appear for you, or if you had issues trying to set up Crows nest outside of this tutorial, continue below.
File crowsnest.conf DID NOT get created
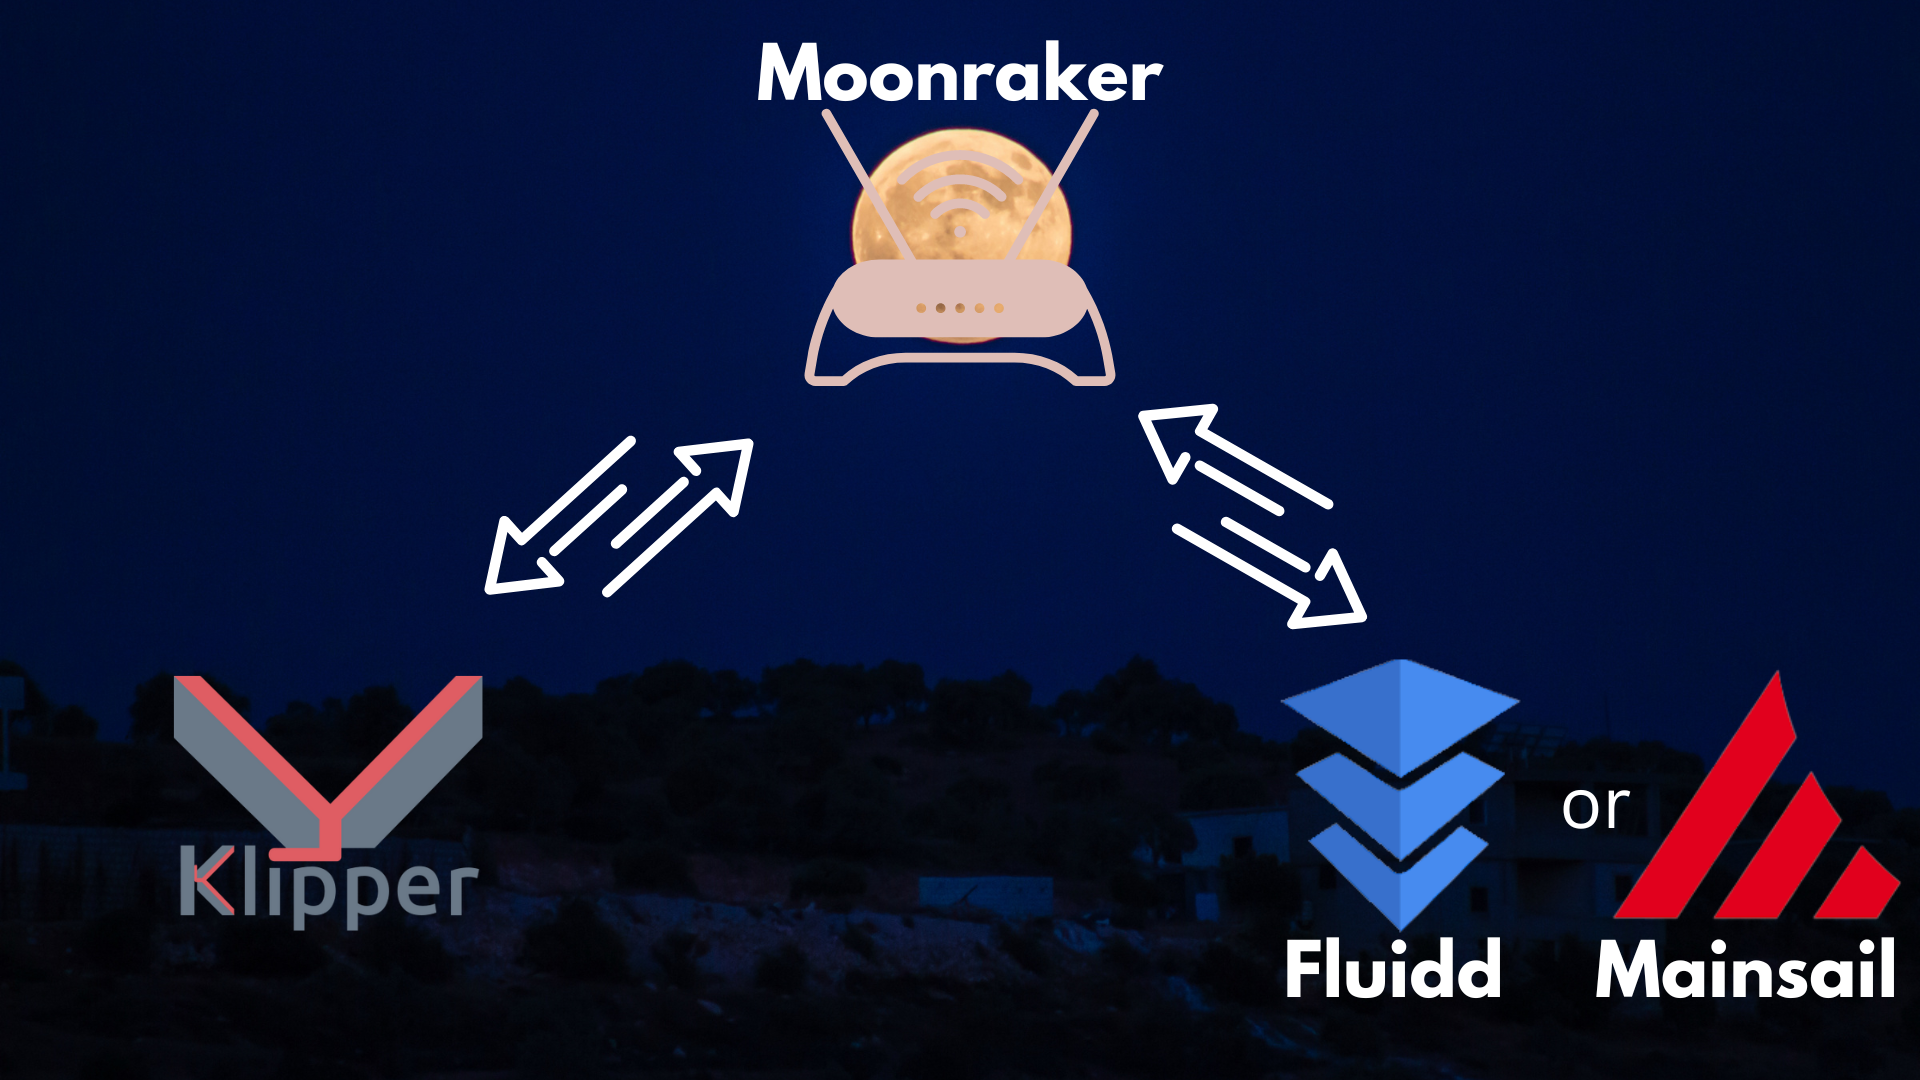
The phrase ‘did not get created’ is not entirely accurate. Crowsnest.conf was in fact created, but where the file was placed is the issue. To understand where it is I first must mention the three pieces we needed when we first installed Klipper. Those pieces were: Klipper, Mainsail, and a front end(either Fluidd or Mainsail). The middle piece, Moonraker, is the communication intermediary between us on the front end, and the Klipper firmware. As of October of 2022 Moonraker made a major change to it’s folder path structure which effected both of the other two pieces (Klipper and your front end).
Prior to the update Moonraker used to house all configuration files in a folder named ‘klipper_config’, but the recent update changes that.
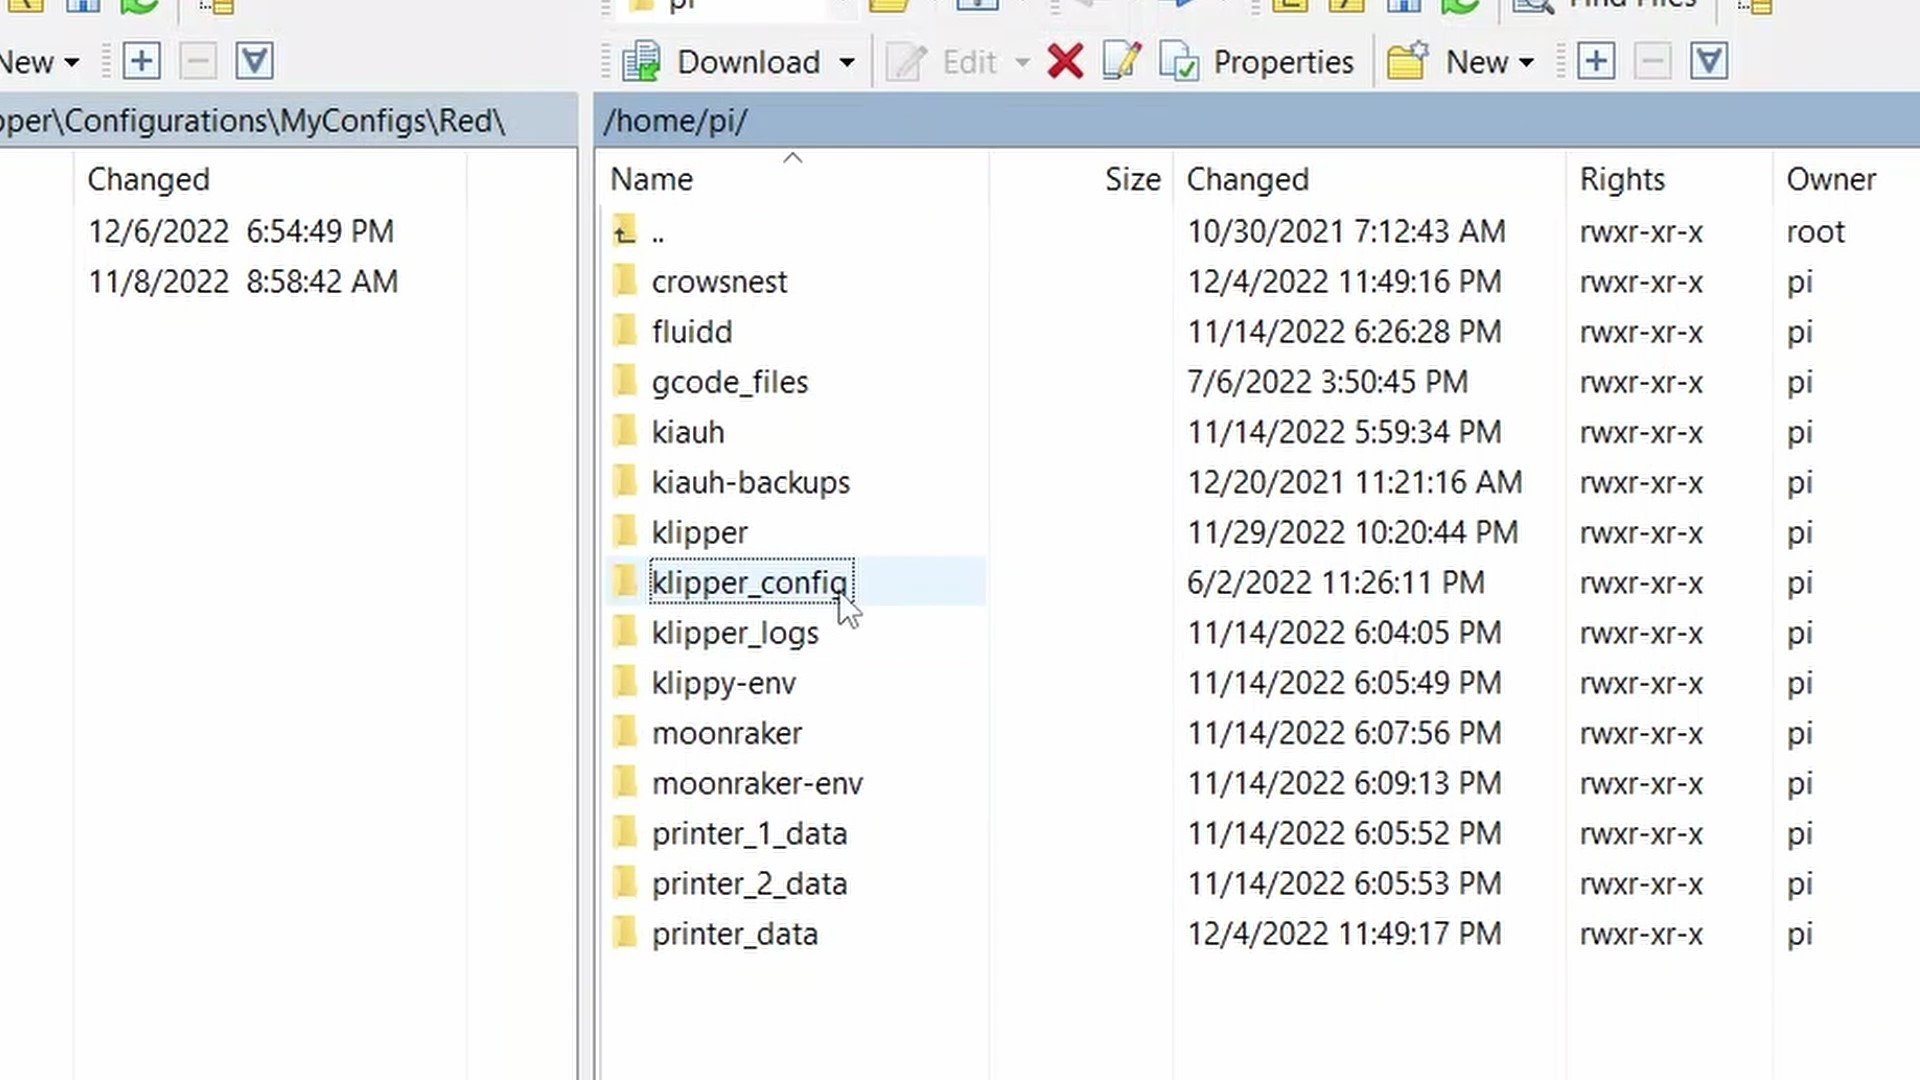
Moonraker now stores all of the configuration files in a folder named ‘printer_data’.
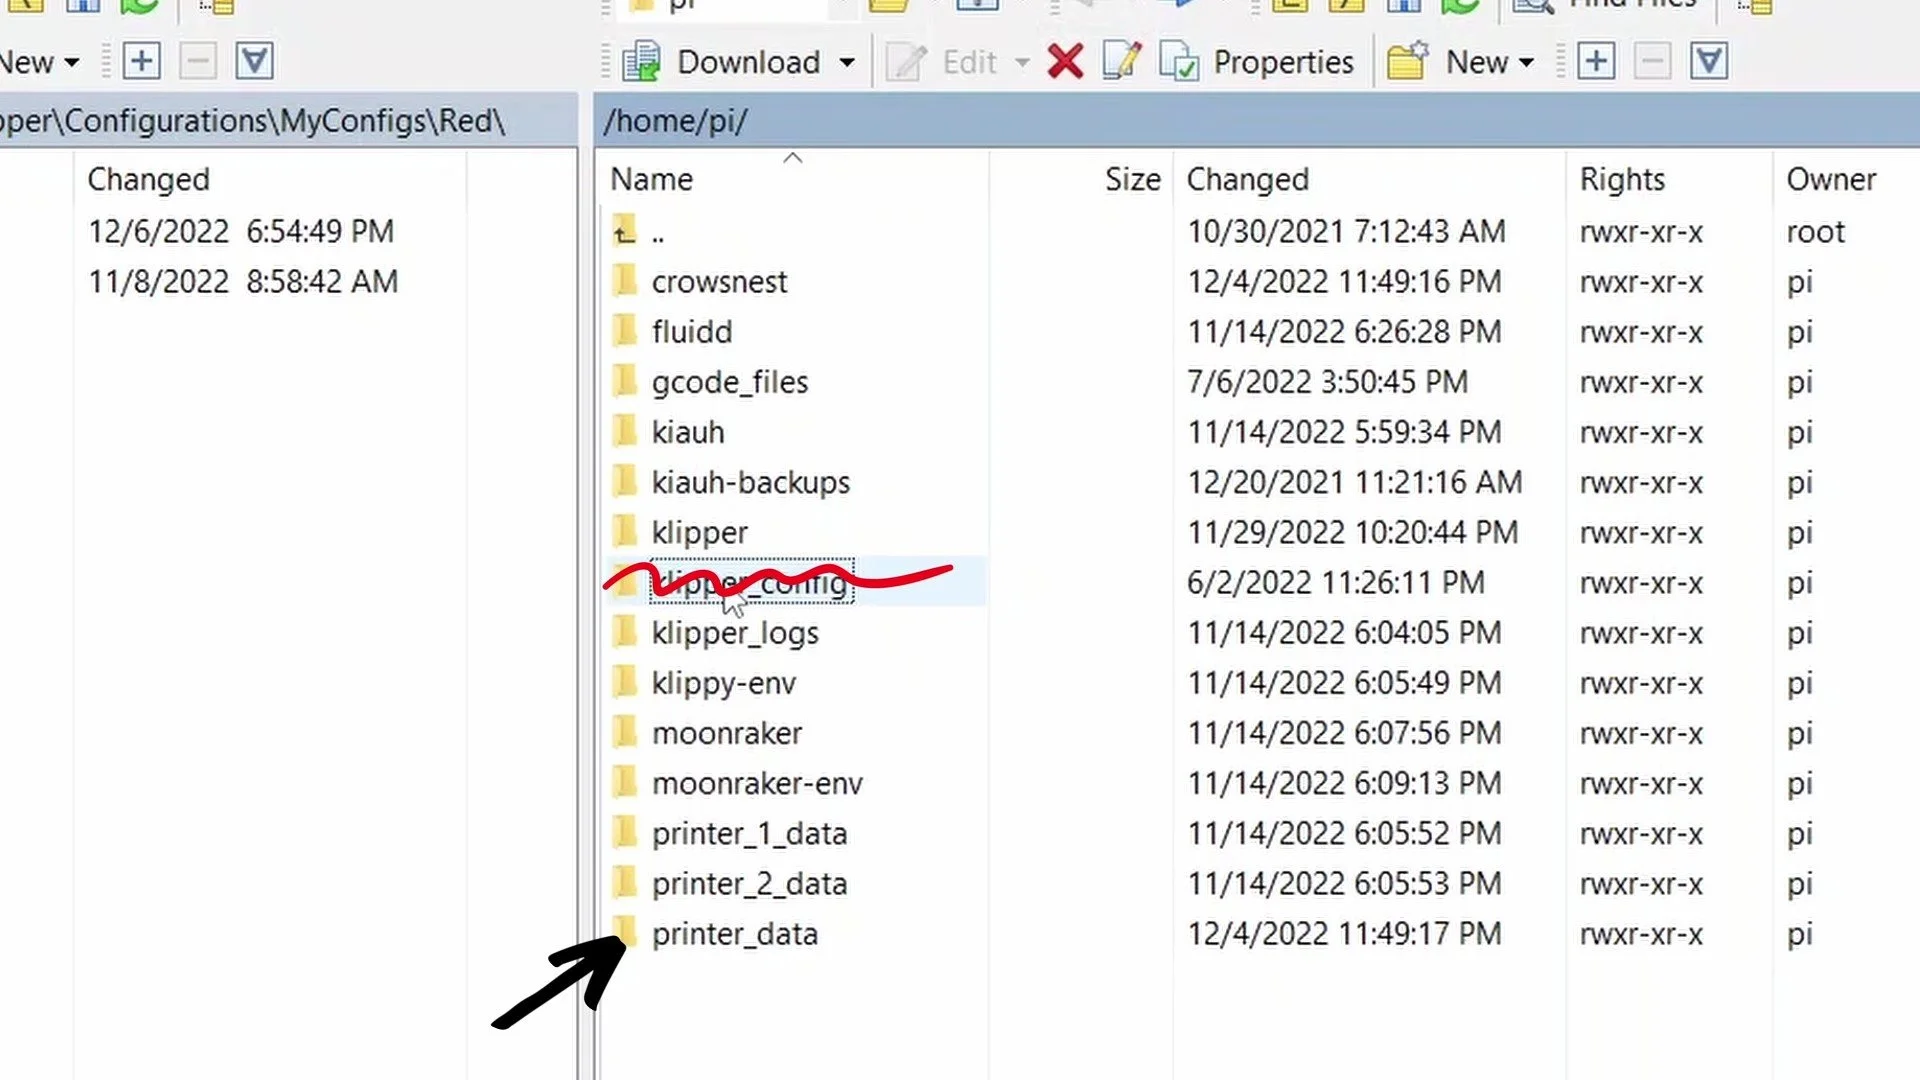
CrowsNest has adopted this new folder structure, so it populates the ‘crowsnest.conf’ file within the printer_data folder
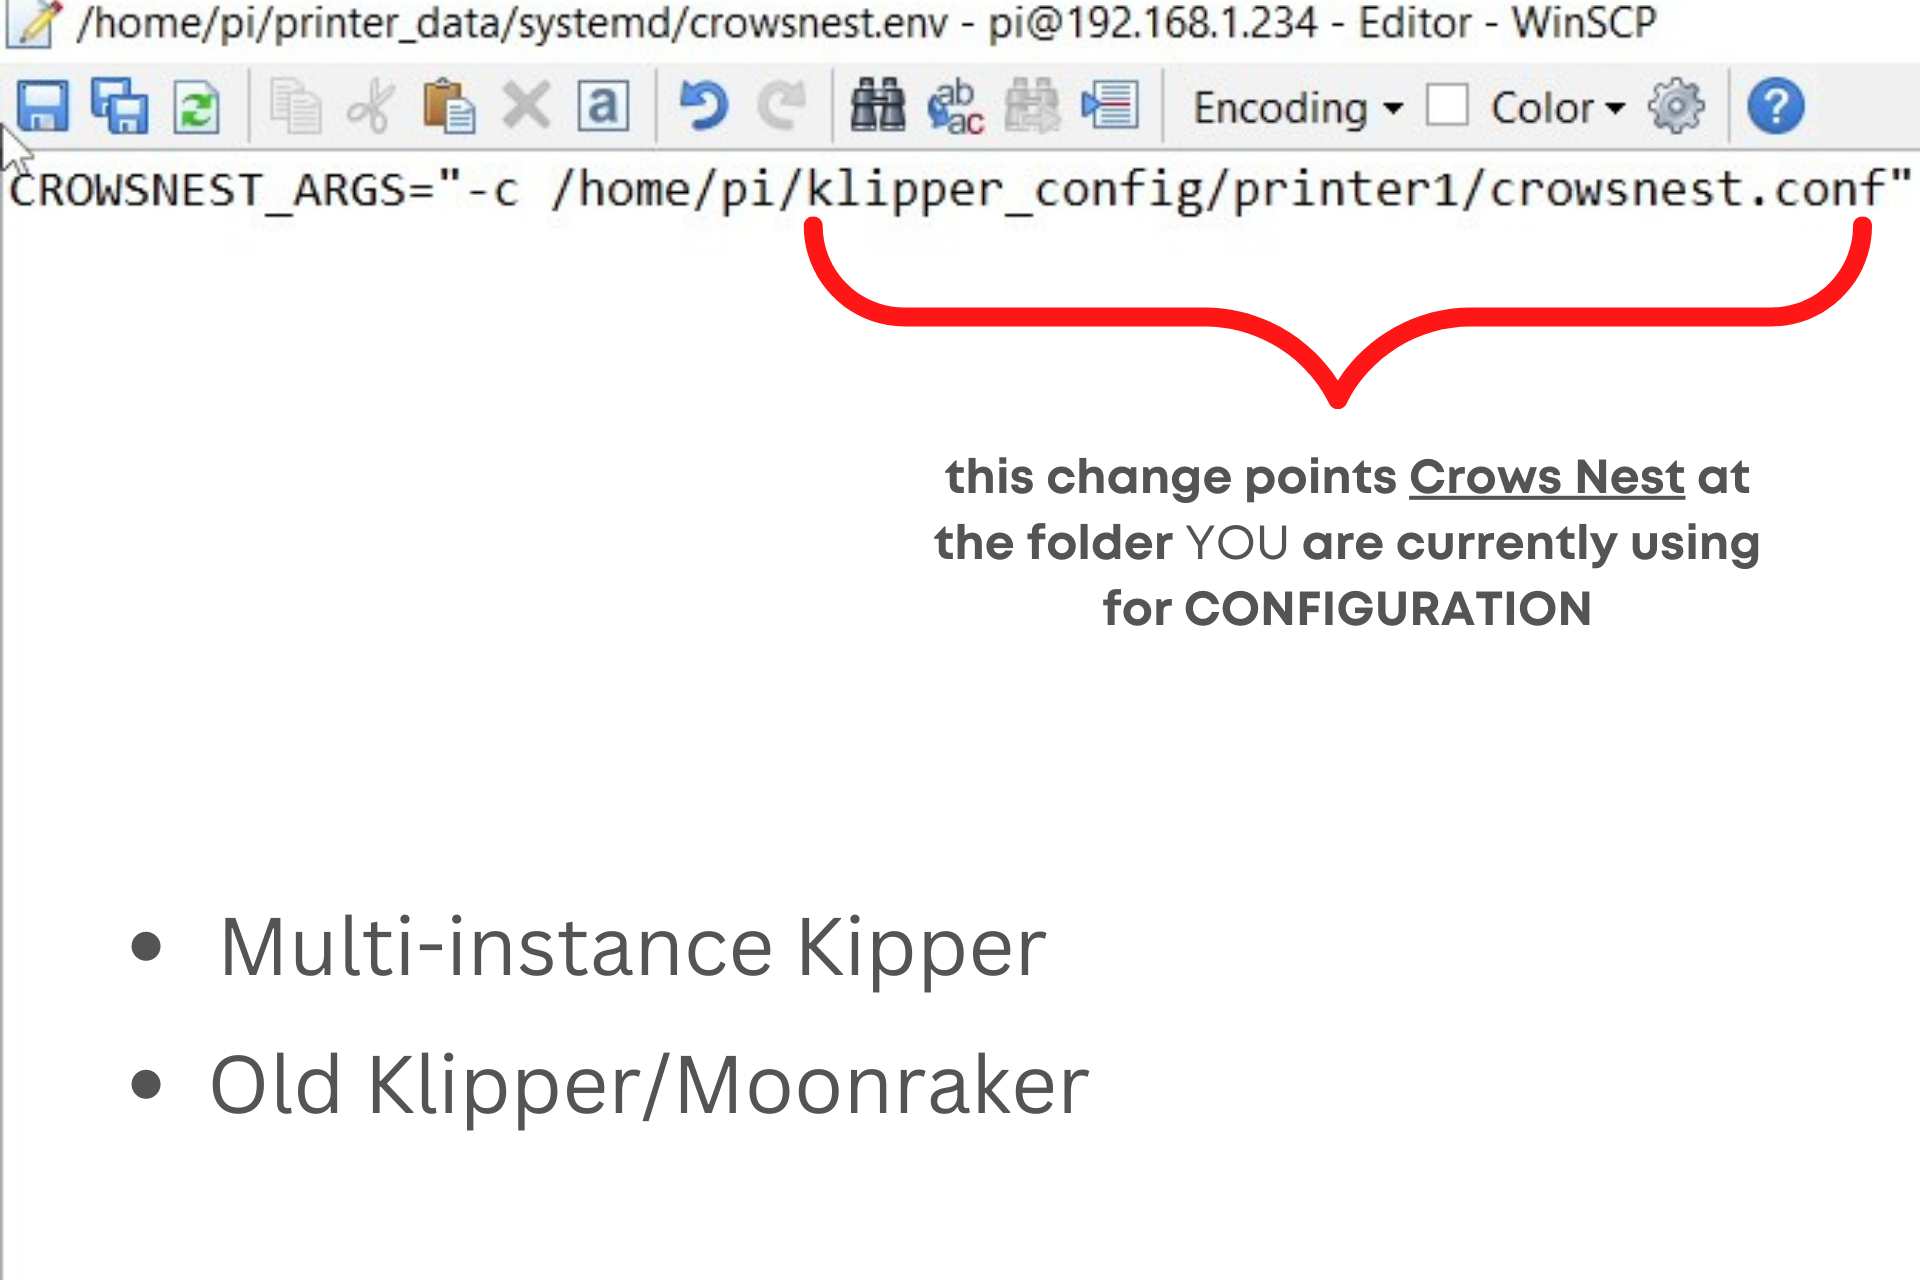
If you are using an older installation of Klipper/Moonraker your front end is still looking through the klipper_config folder to find your files. That means it will never find the file that CrowsNest created.
SSH using WinSCP
In order to diagnose, and ultimately fix, this issue, you need to SSH into the host device. This time SSH using WinSCP, which functions like a normal SSH terminal but offers a more user-friendly gui. This way you can see all the files and folders that are saved onto the host device.
SSH into the host device using WINSCP.
If you’re familiar with PuTTY and terminal line commands, all the below information can be executed from there using vim or nano.
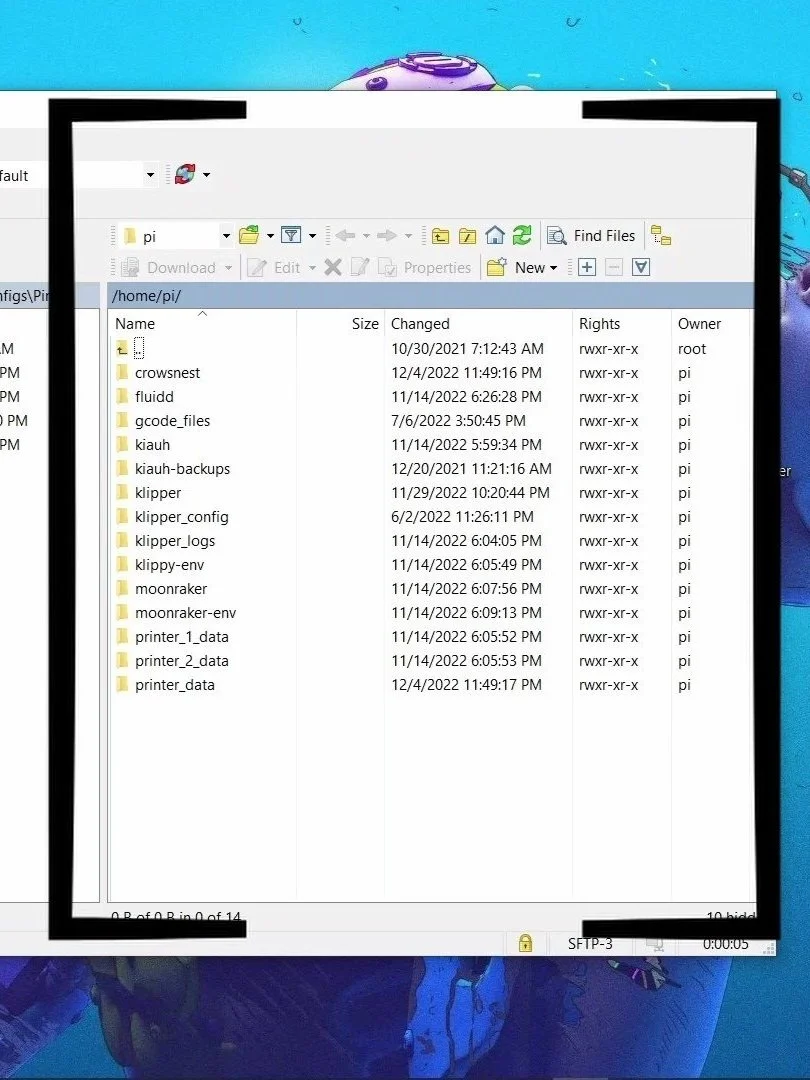
When WinSCP opens the right side of the partition are files and folders local to the MCU. The files and folders on the left side of the partition are local to the computer you are using. We will be concentrating on the right side of the partition.
By default you you should be looking at the file path home/pi(or Quadra)
To find out, click the box drop down above the files
Select the root location (may be called home)
Inside this directory find the folder that matches the name of the device you are using and enter it (folder called ‘pi’ if using a raspberry pi, a folder called ‘quadra’ if using an Inovato Quadra)
You are now in the correct folder.

This problem will plague you if you are running an older version of Klipper/Moonraker or if you are running multiple instances of Klipper - regardless of installation.
How do you know if you’re running an older verison of Klipper Moonraker?
Single Instance of Klipper:
If you are only running a single instance of Klipper and crowsnest.conf did not populate, you have an older version. (if you’re reading this… you have an older installation)
Multi-Instance of Klipper:
Regardless of installation you will have an issue with this new file path, but it’s important to know if you have an older or newer installation as it will determine how to fix the problem.
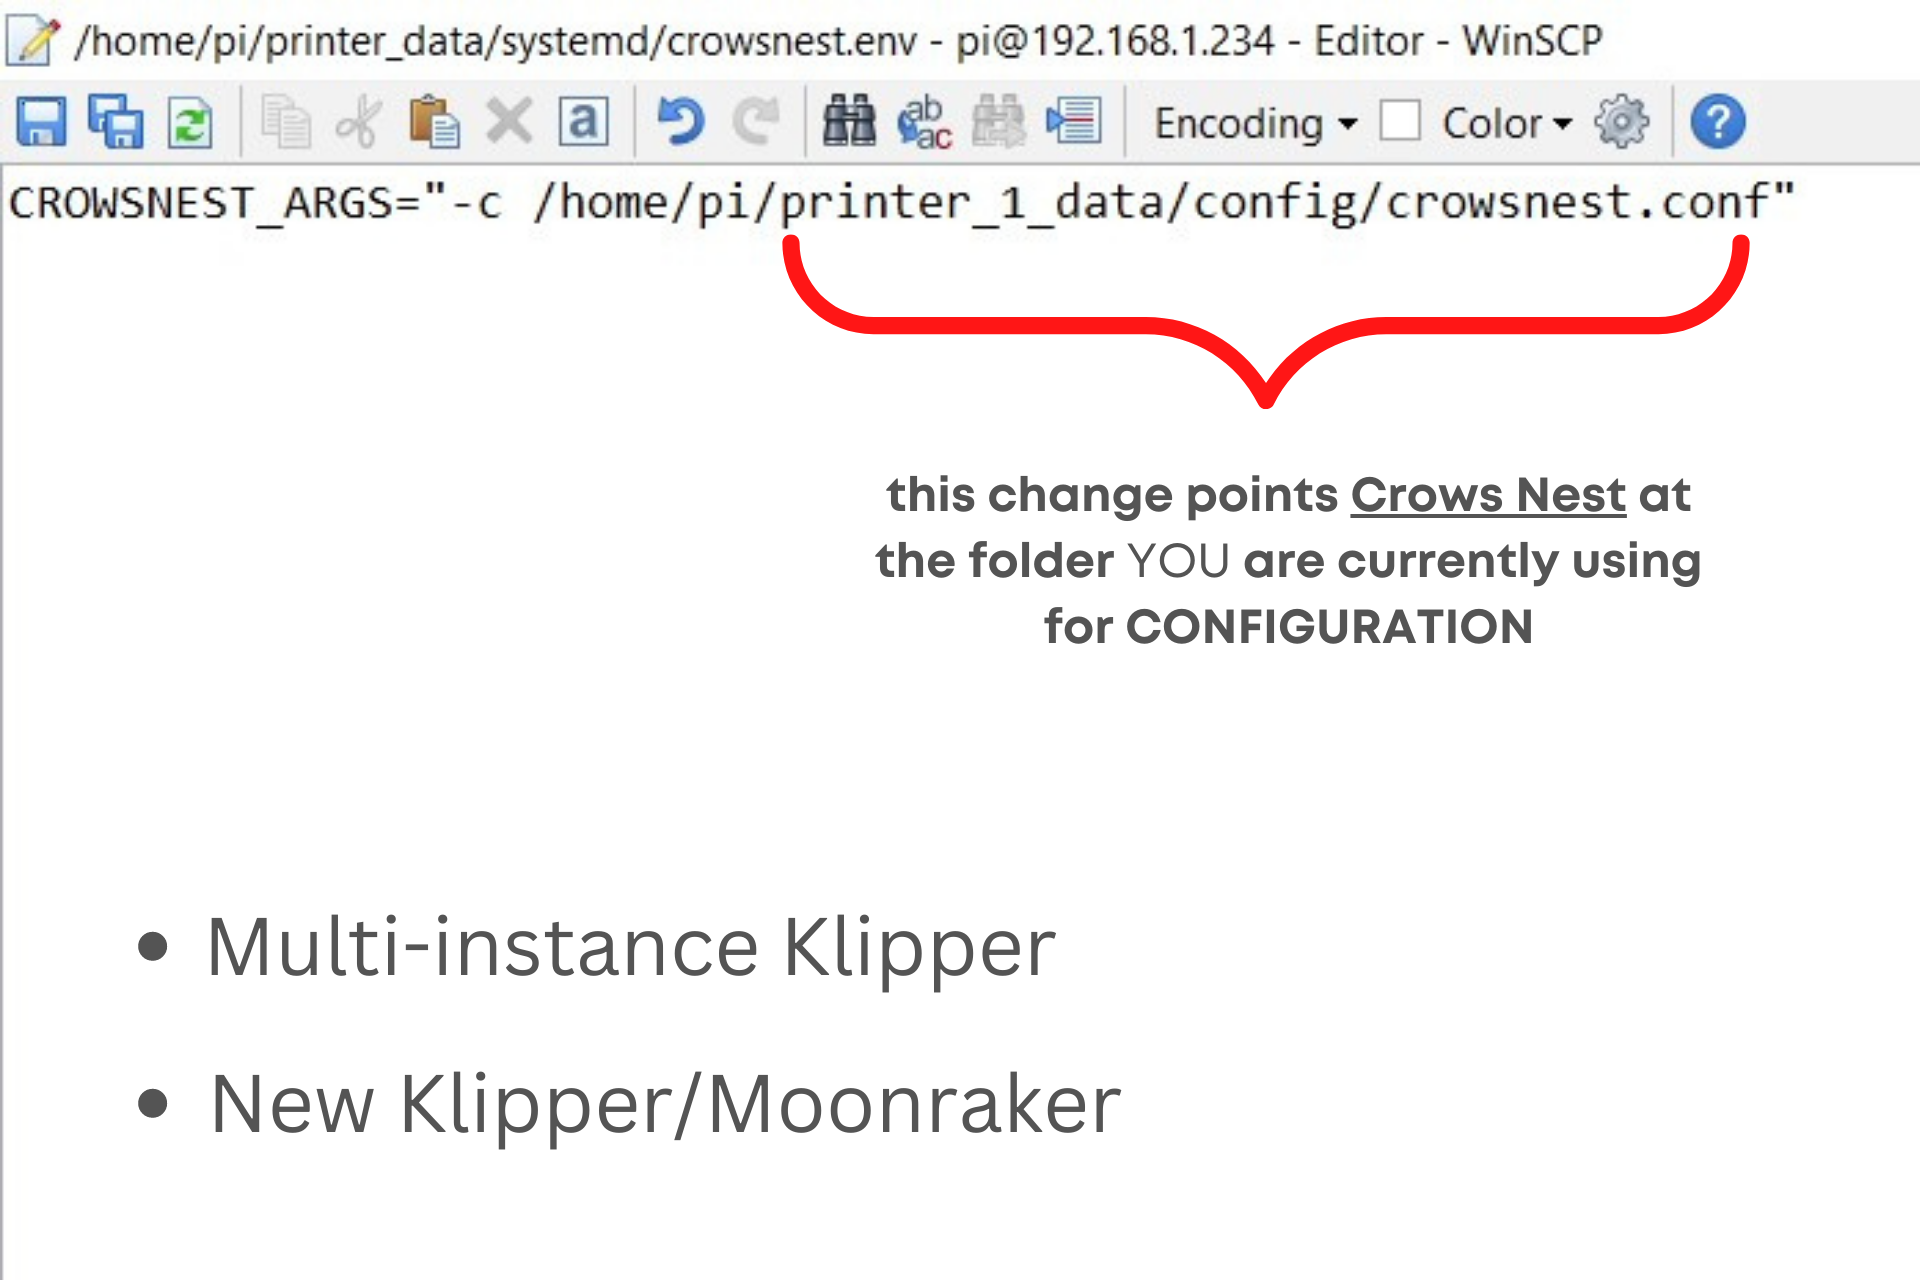
If there are multiple ‘printer_data’ folders (named printer_1_data, printer_2_data, etc) you have a NEWER INSTALLATION.
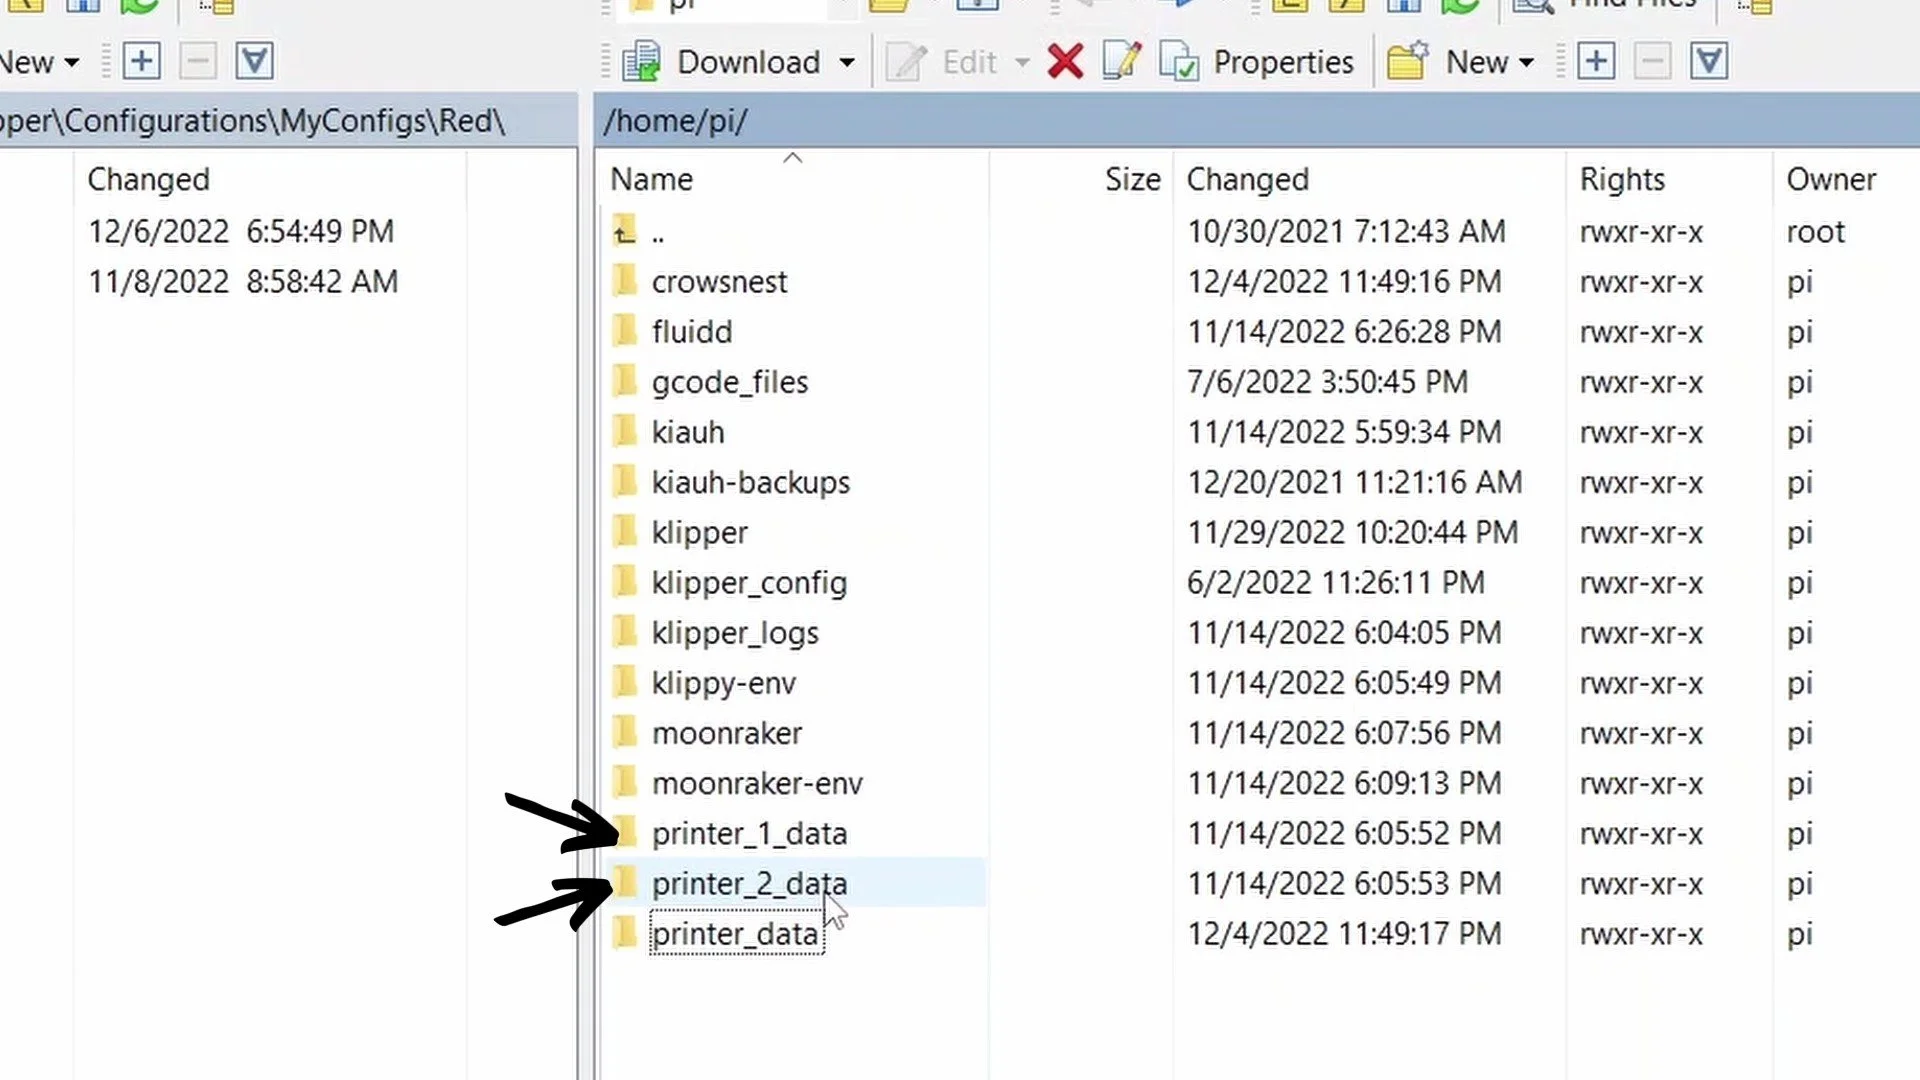
If those folders are not present you have an OLDER INSTALLATION
The Fix
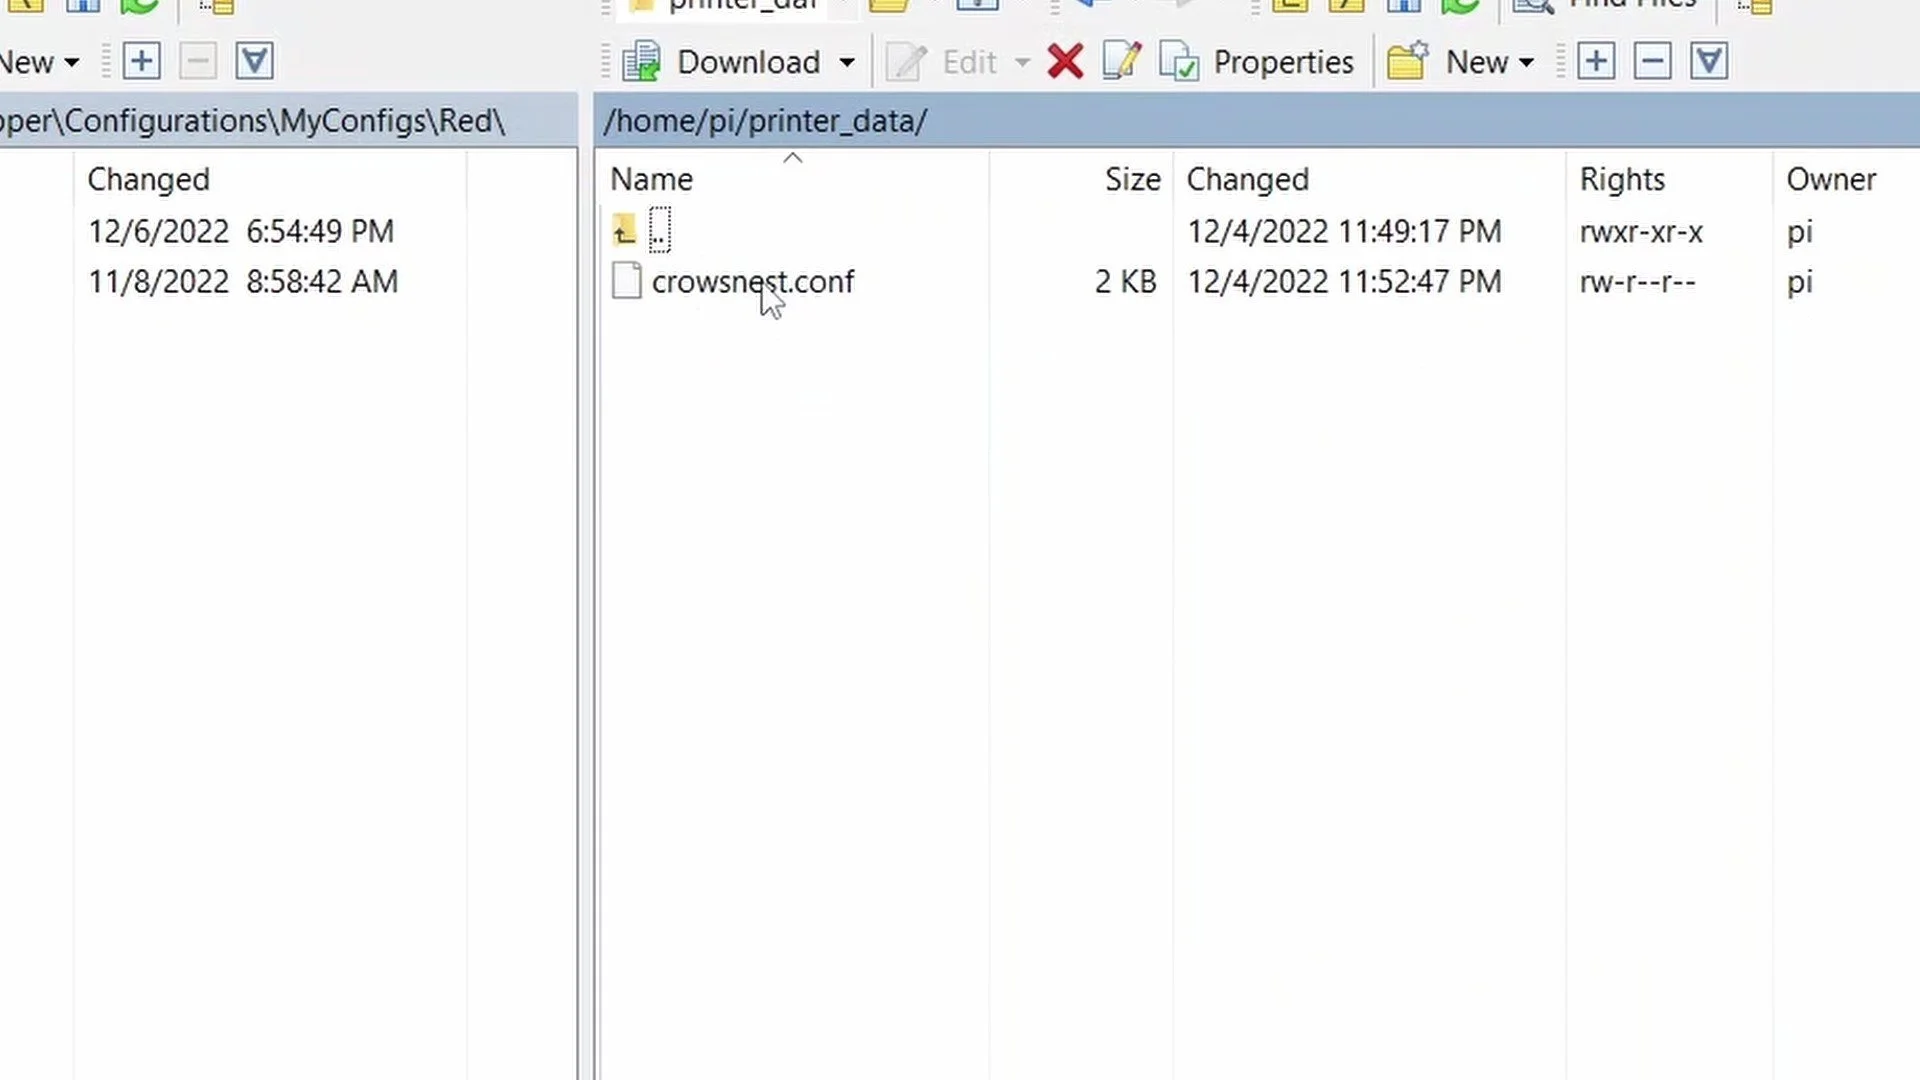
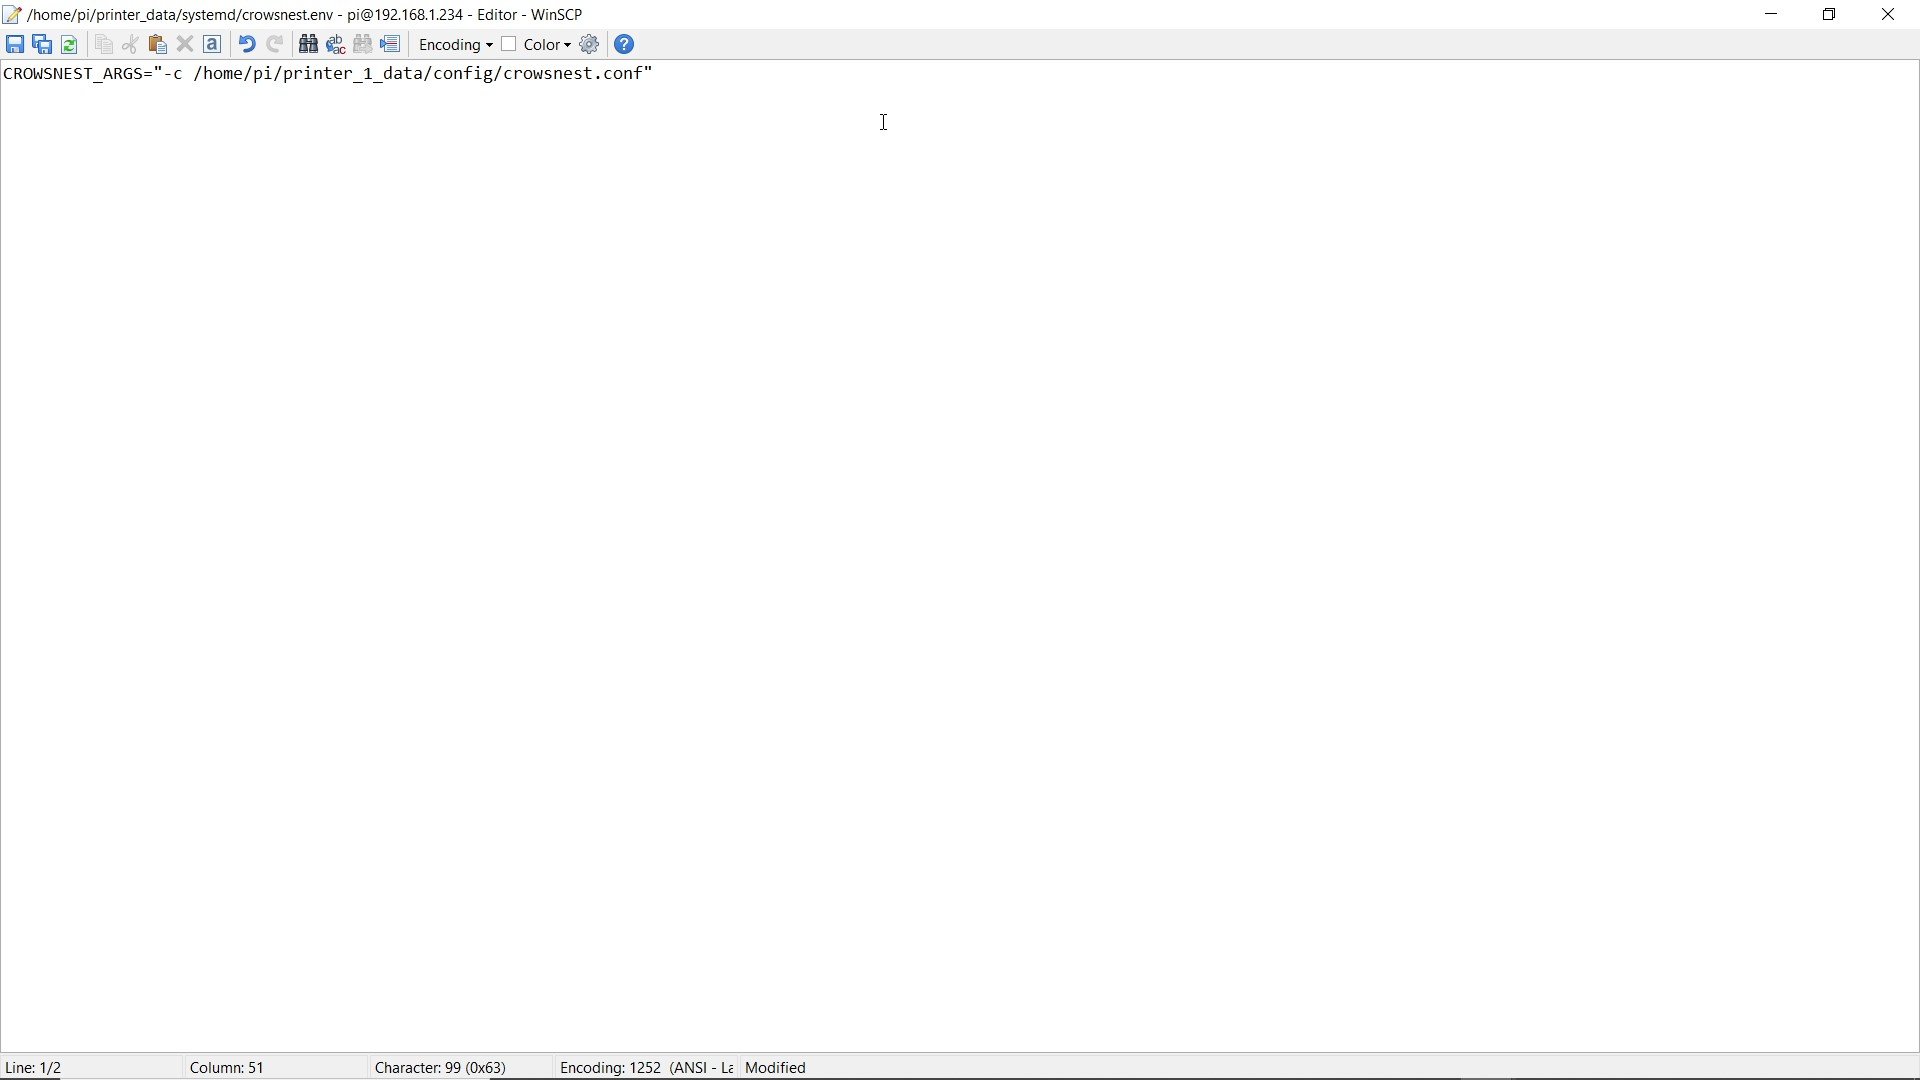
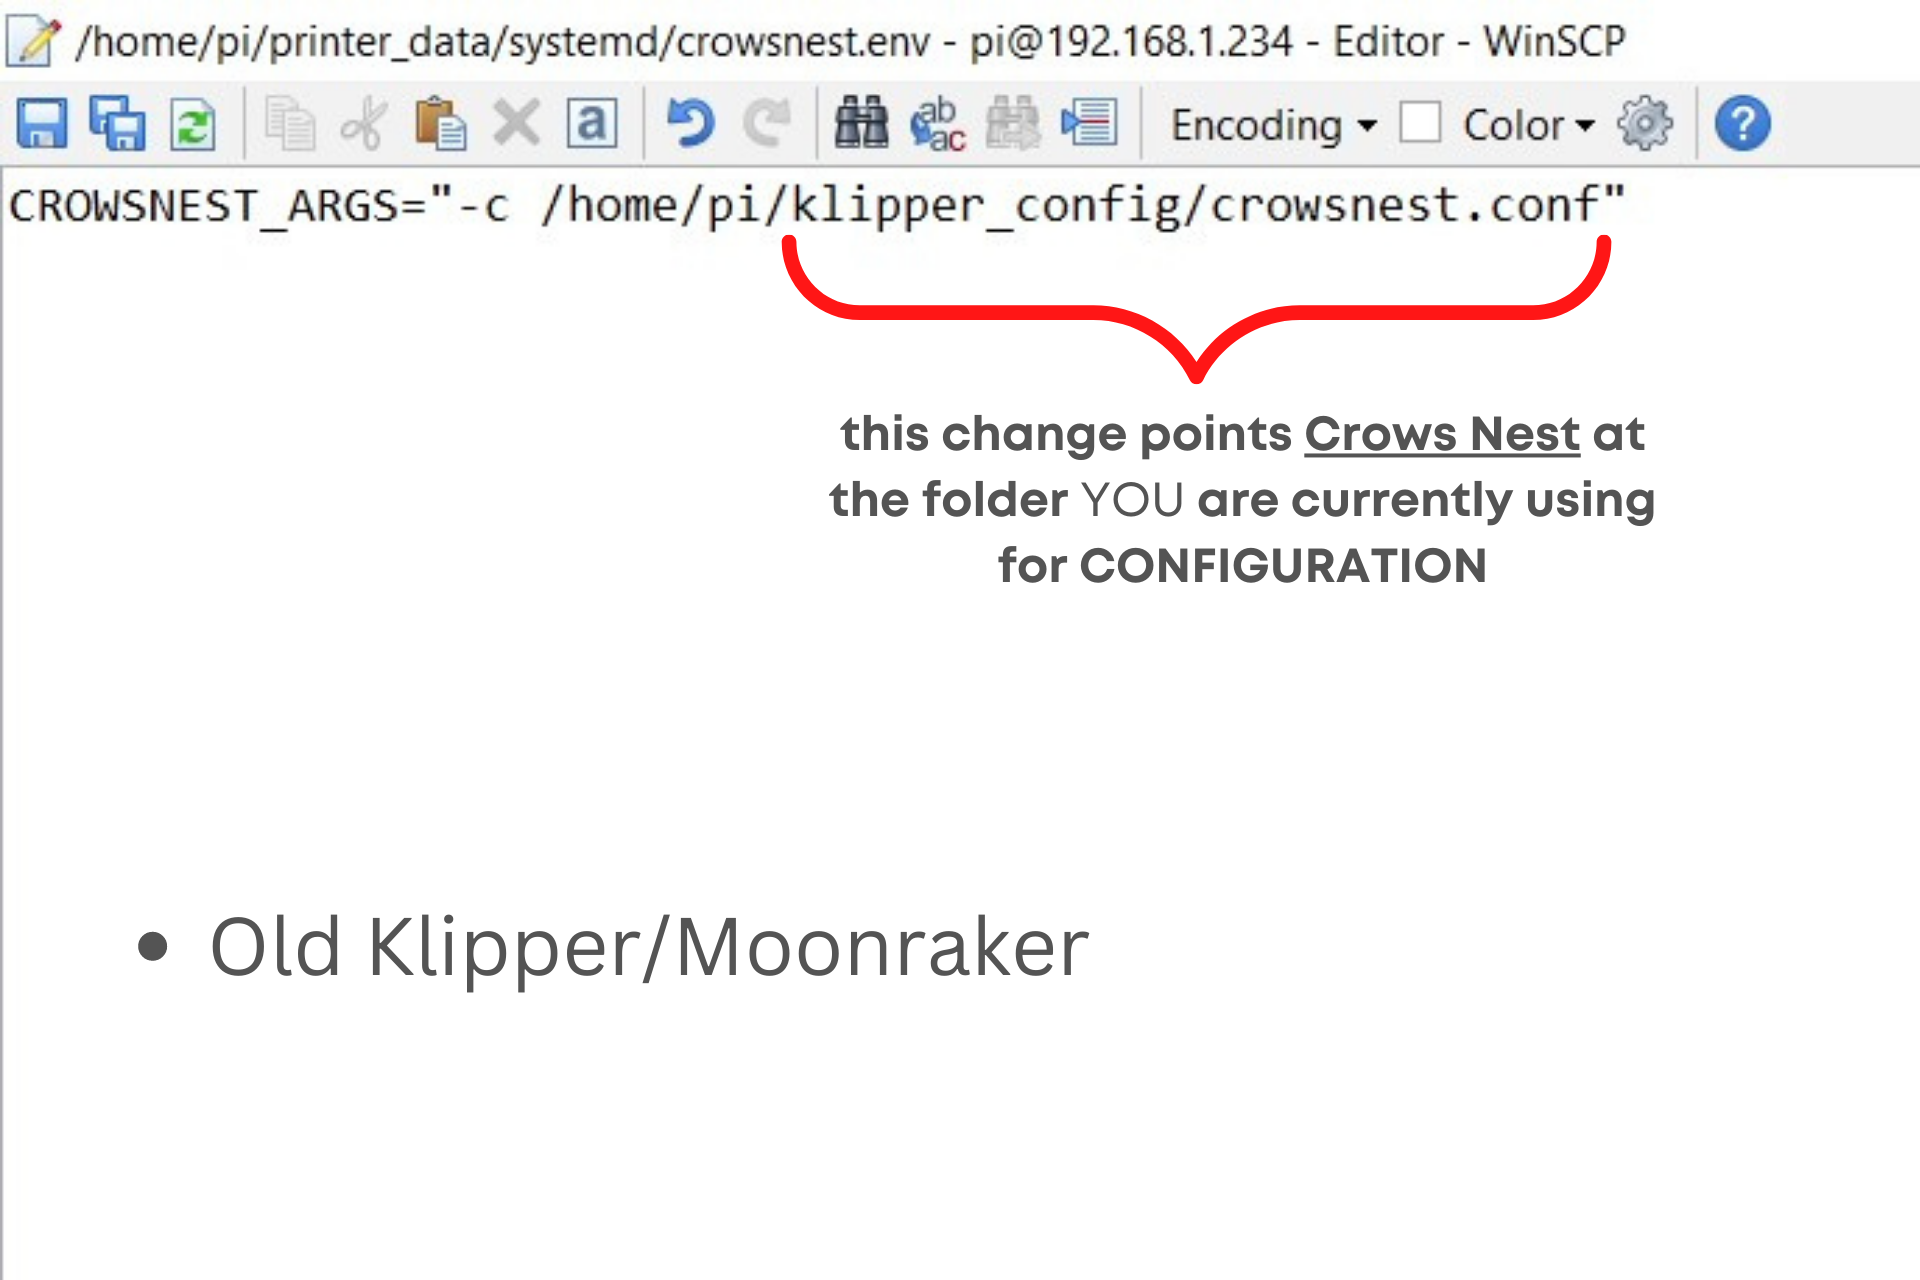
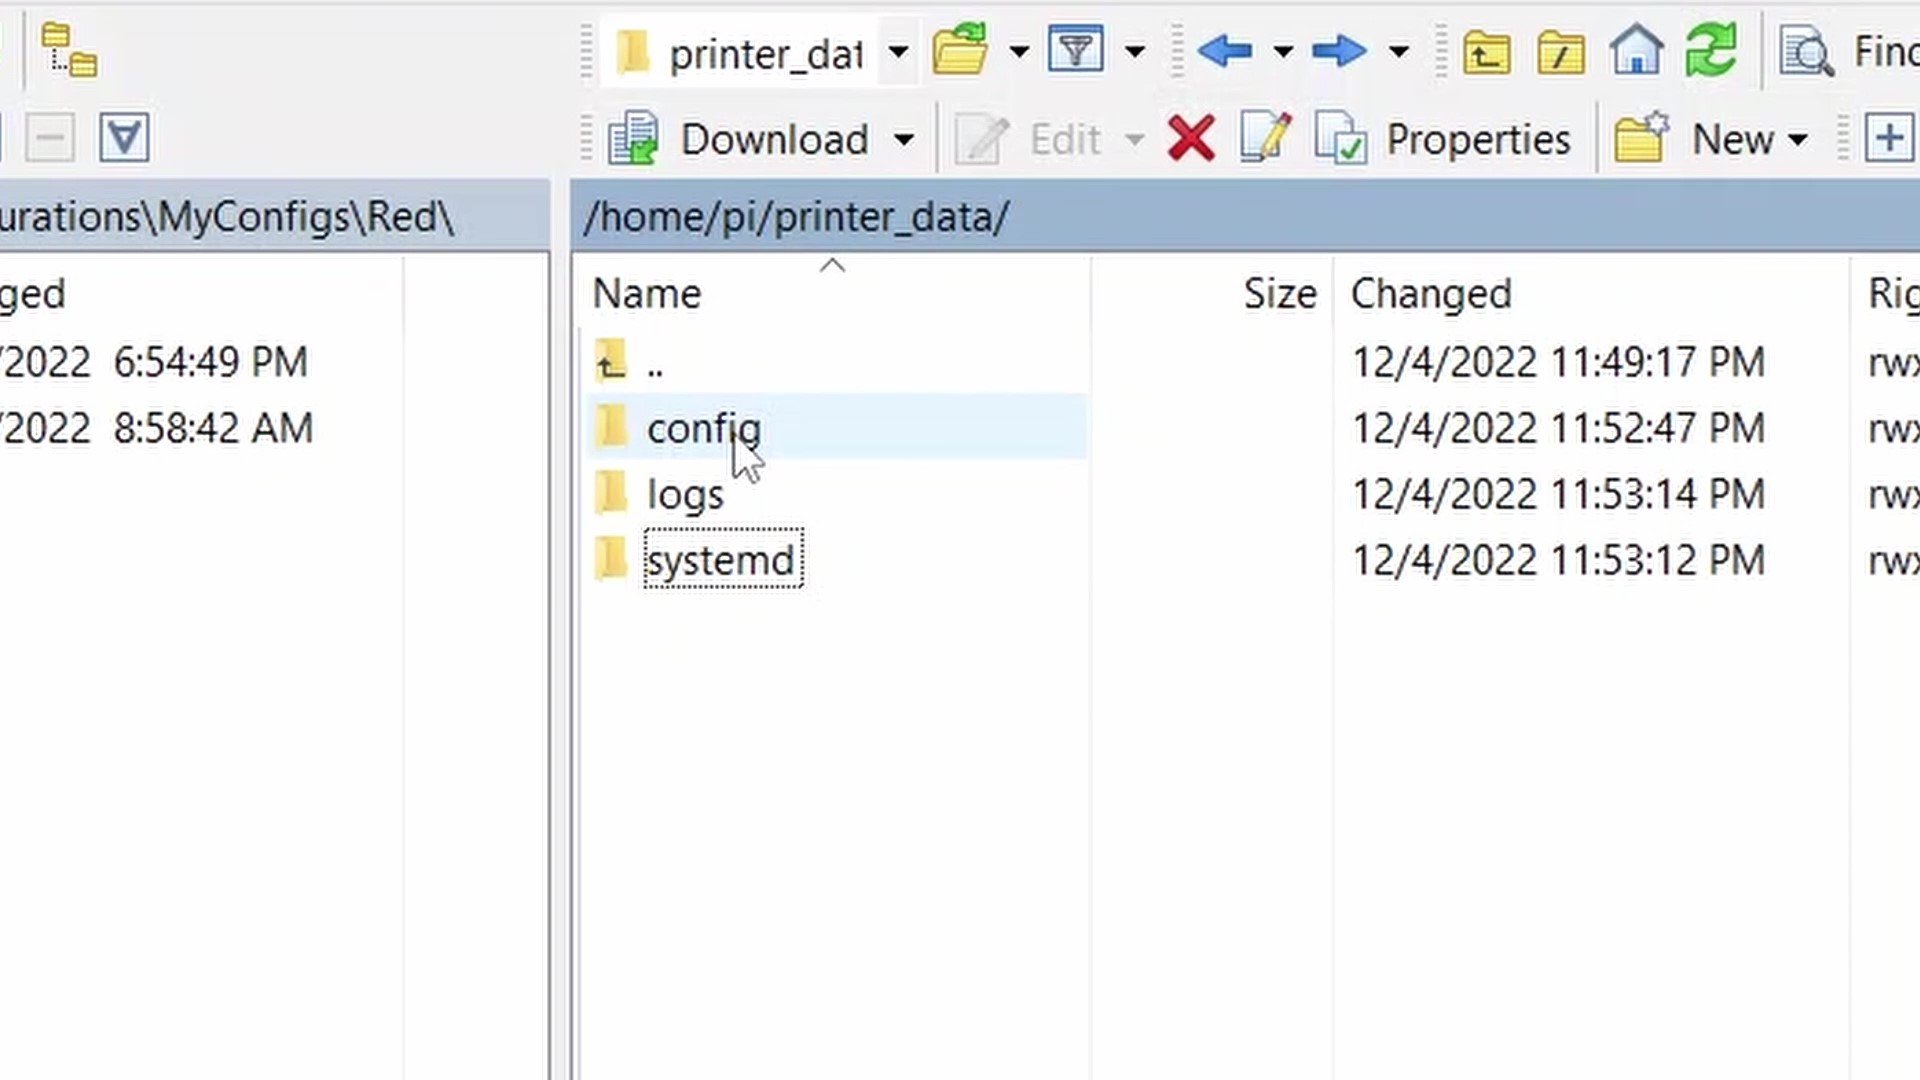
In order to alleviate the problem we are going to tell the CrowsNest service where we want it to look (i.e. which folder it needs to look in to find our configuration file). In order to do that we will need to edit a file named ‘crownest.env’. To find that open the ‘printer_data’ folder, and then a folder named ‘systemd’
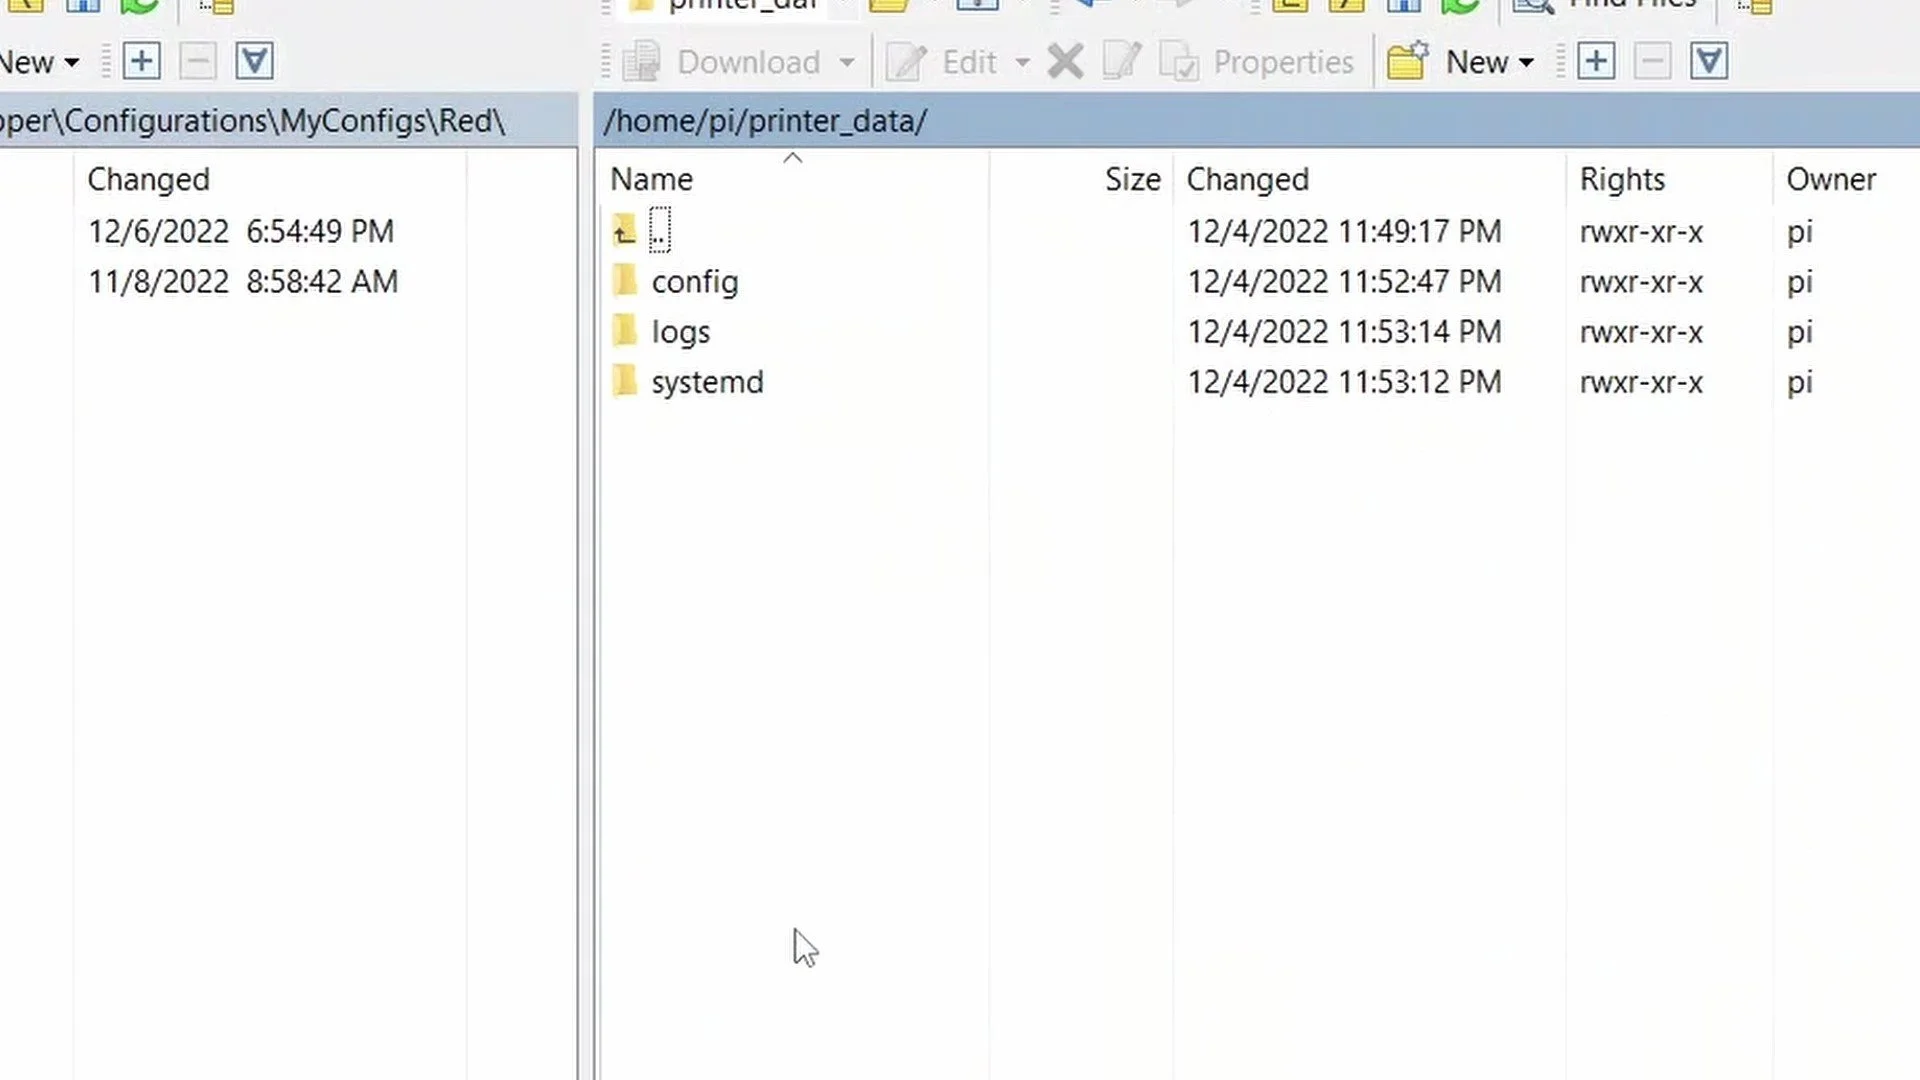

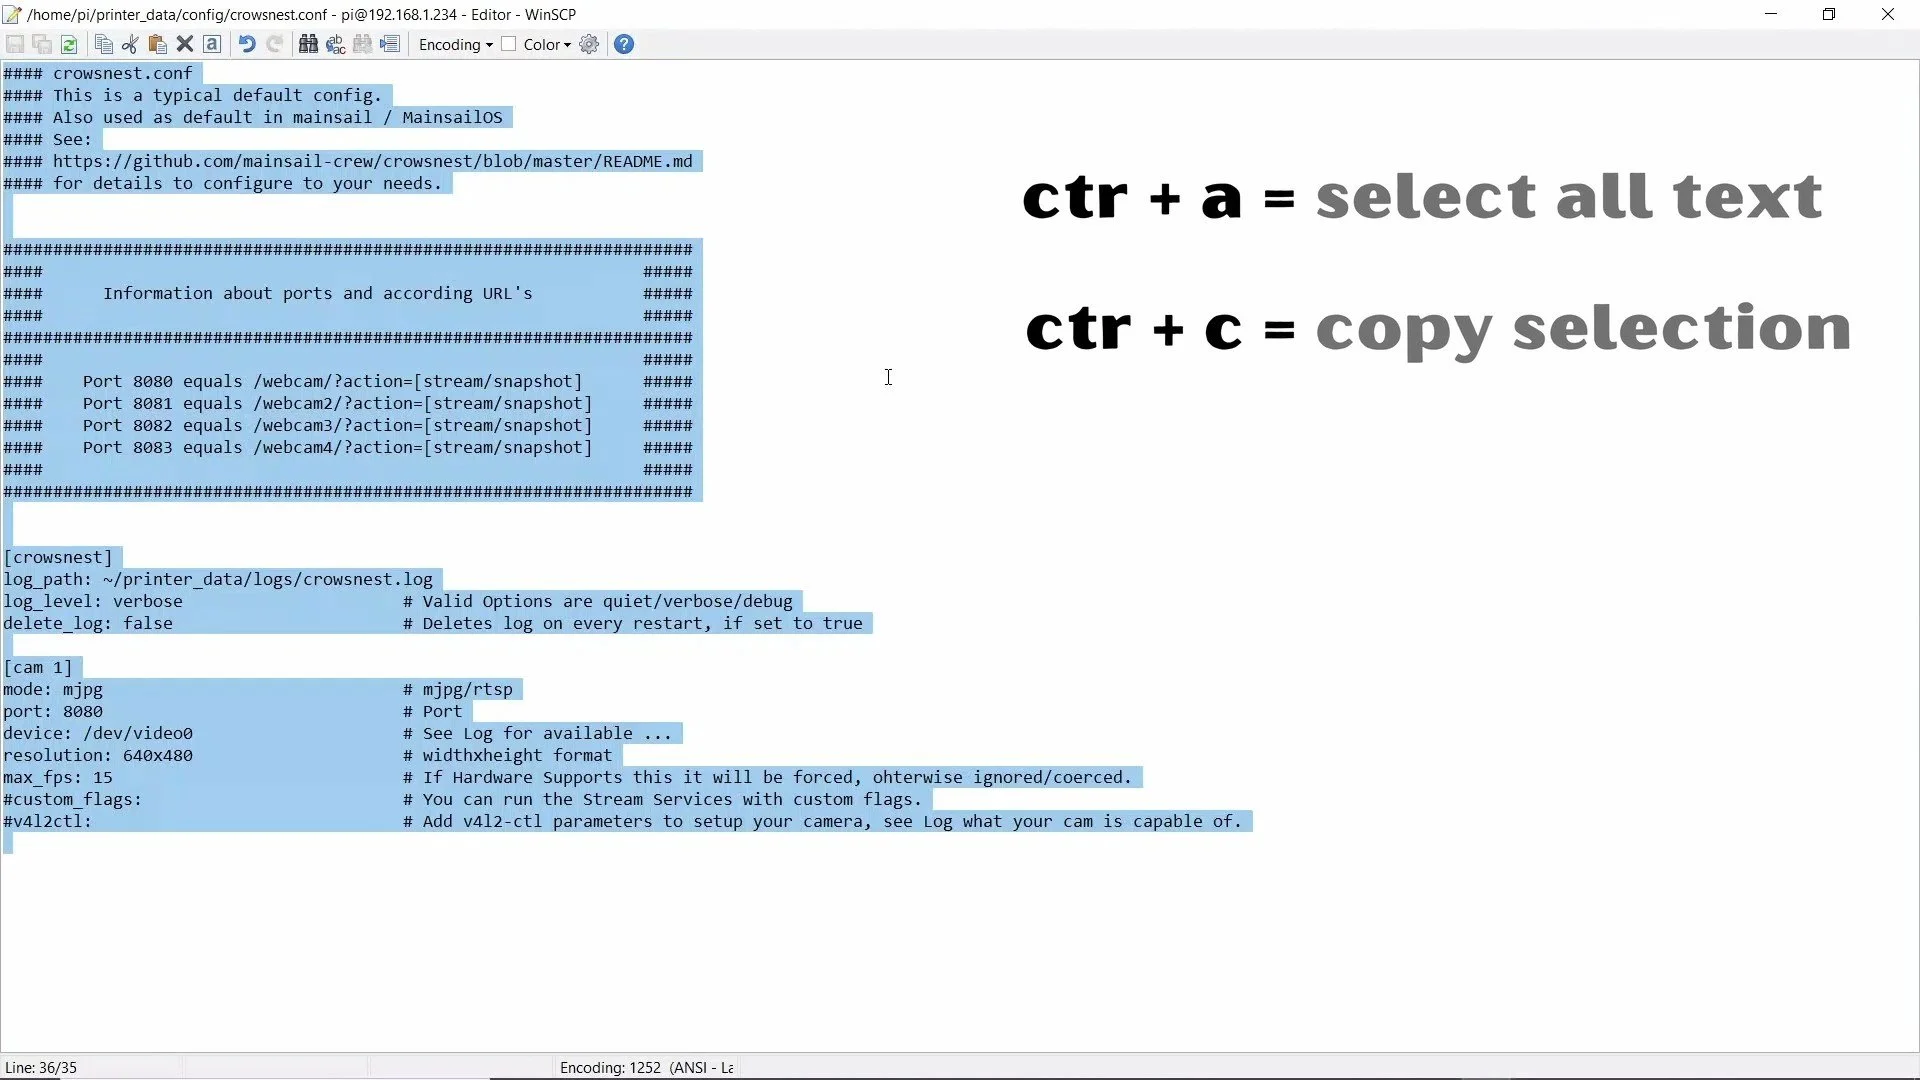
Double-click crowsnest.env to open it in an editable window. This file should only house a single line, and it is the folder path where CrowsNest will look for the configuration file. It is currently set to look within printer_data, but for those of you reading this, that is not correct. Based on your configuration you will need to edit this line and then save the document for the change to take effect.
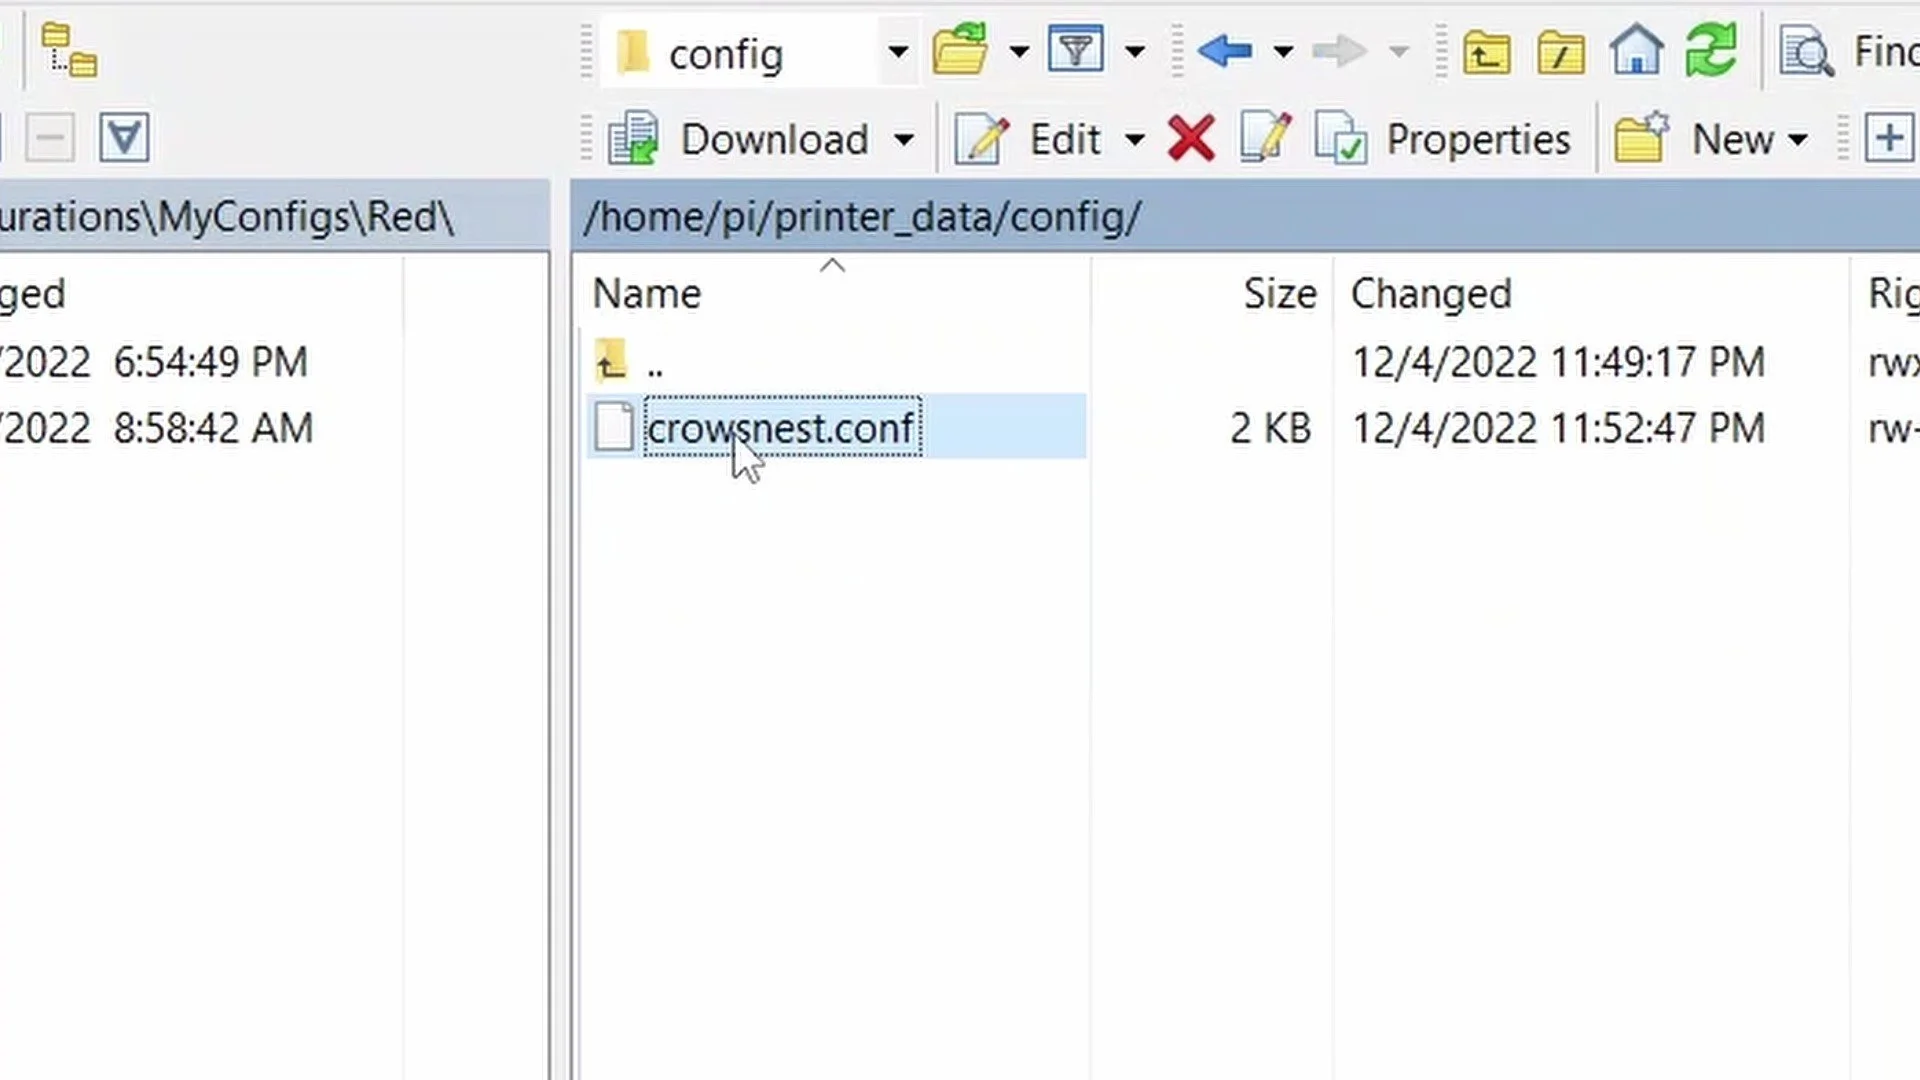
After saving that file navigate back one folder. You will still be within the printer_data folder, double click folder named ‘config’. Inside this folder will be a single file named ‘crowsnest.conf’ (the file all this fuss is about). Double click the file to open it, and then once it opens on a text editor highlight all the contents (ctrl+a) and then copy all the highlighted text (ctrl+c). You can now close out WinSCP and reopen your front end.
Creating the configuration file
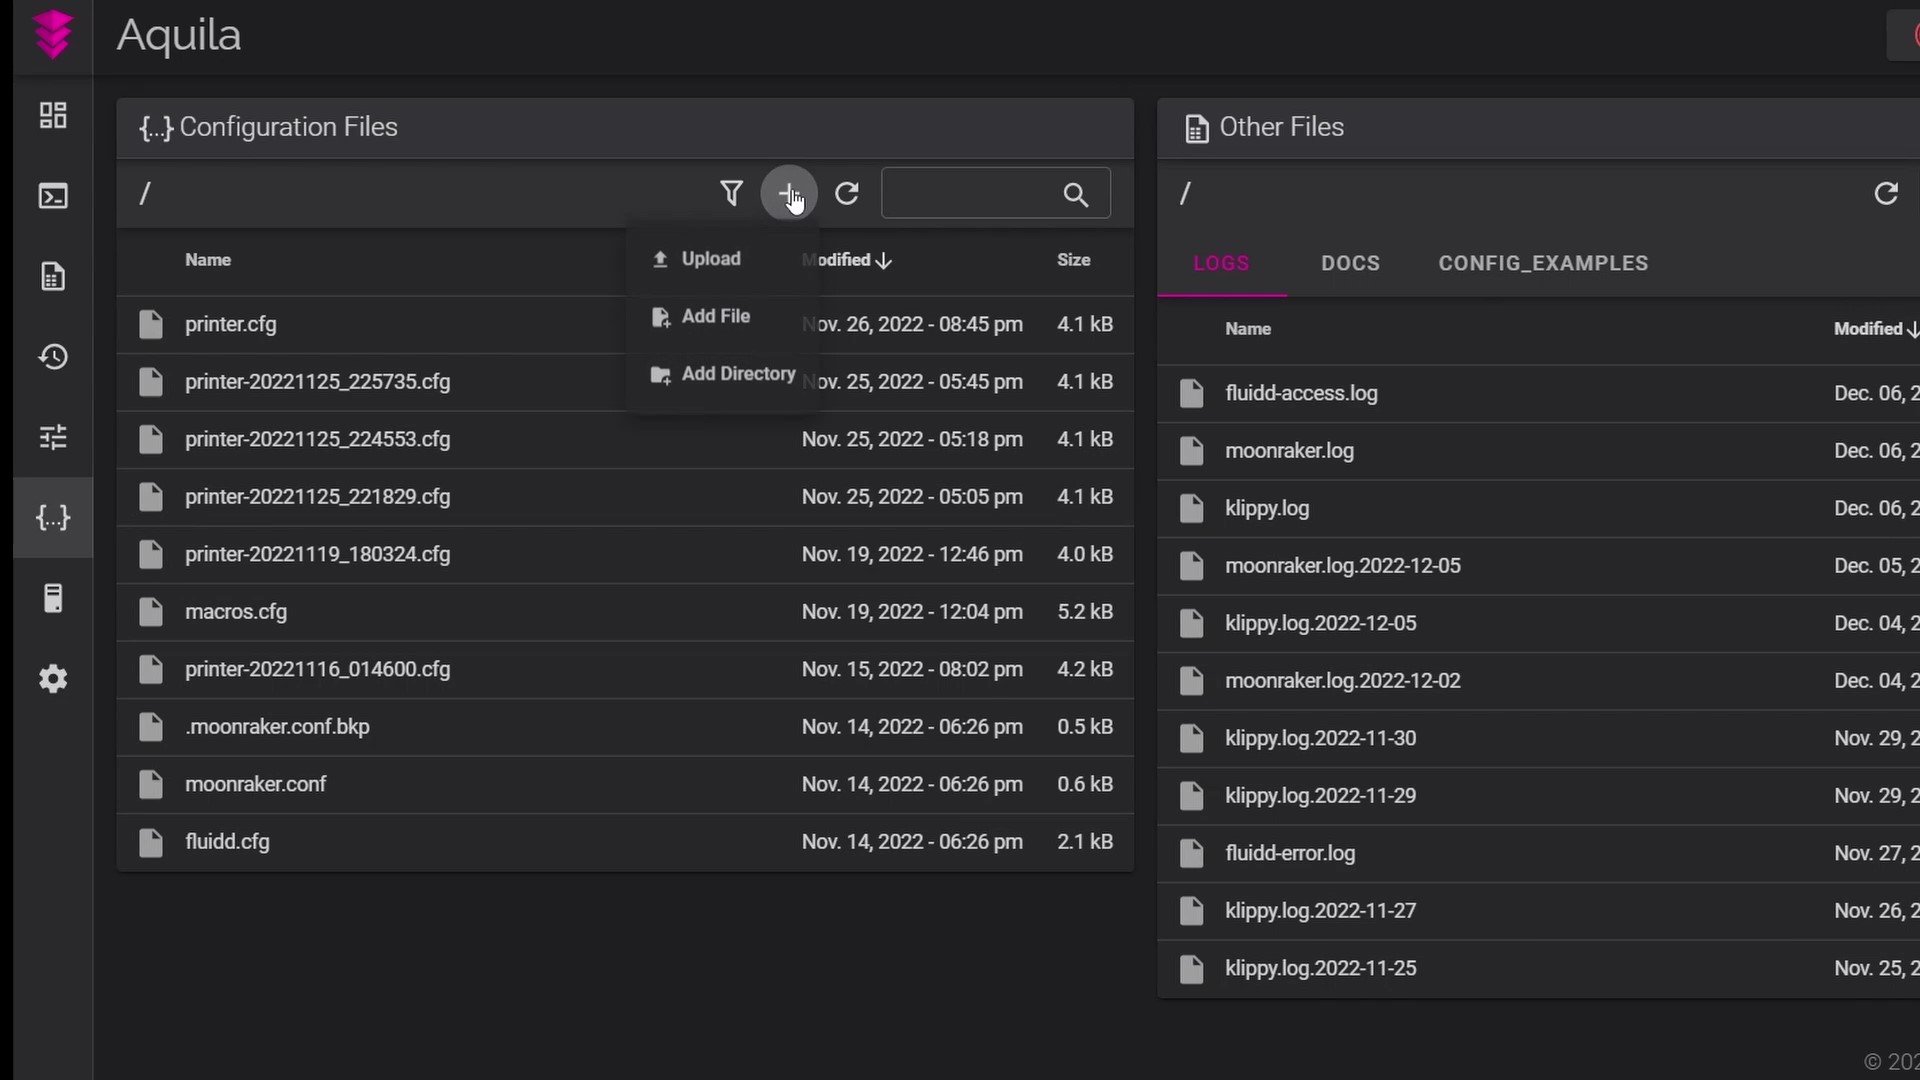
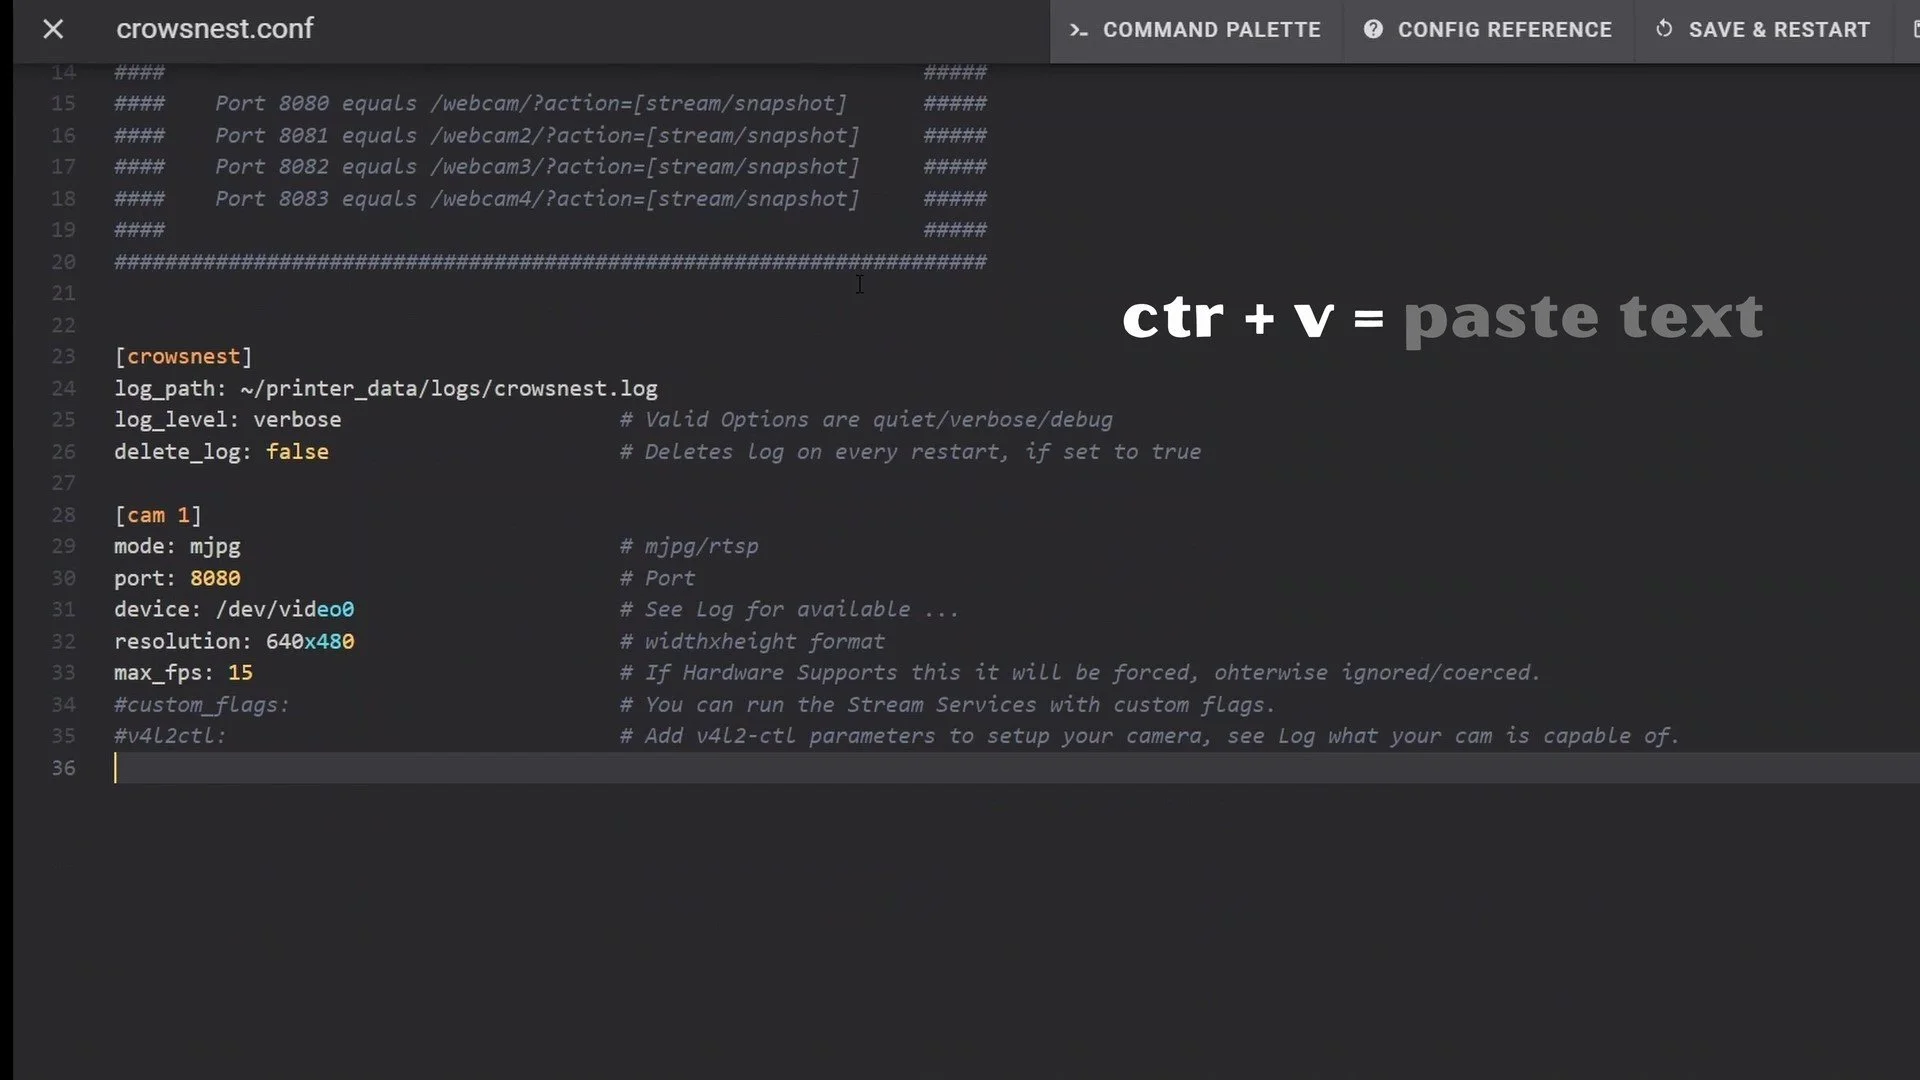
Back on your front end venture to the Configuration menu. Once there find the option to ‘Add File’ and select it. Create a file named ‘crowsnest.conf’ - it must be spelt exactly this way. Once created open the file and then paste in all the text you copied from the original file (ctr+v to paste).

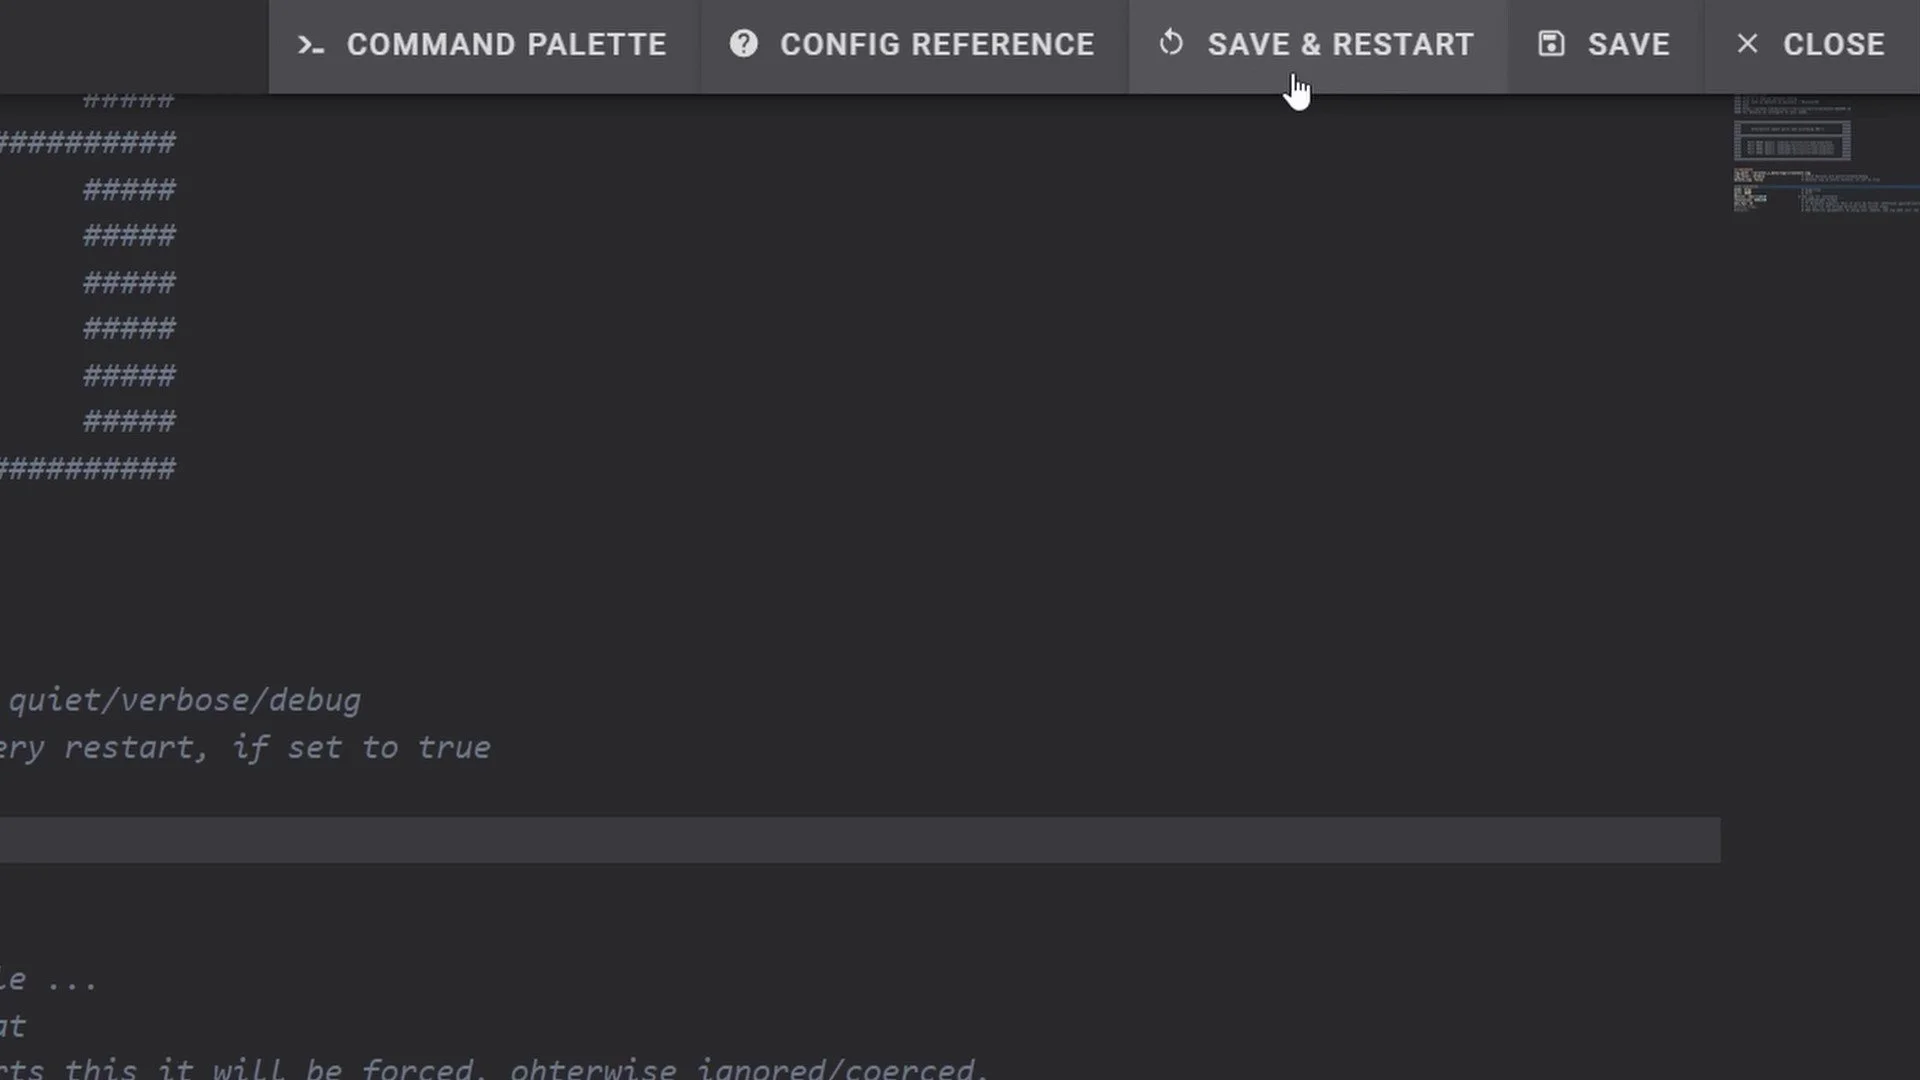
After you’ve pasted the text use the Save and Restart button at the top left of the file. This will ‘restart’ the CrowsNest service and all the changes you made will take effect.
You have now created a crowsnest.conf file that will be used to configure your cameras, and CrowsNest is looking in the right folder pathway to find it!
*keep in mind if you’re running an older version of Klipper/Moonraker it may be wise to update your installation to the newest version as this issue with CrowsNest is just the beginning. As more services get updated you will continue to have folder pathway issues. Of course if you choose to update Klipper/Moonraker make sure to backup all your files!
Crowsnest Configuration
The CrowsNest configuration file is very simple, and that’s what make sit so powerful, you likely will not need to any changes to this file to get your first camera operating. There are only two sections, the top is named [crowsnest] and the bottom [cam 1].
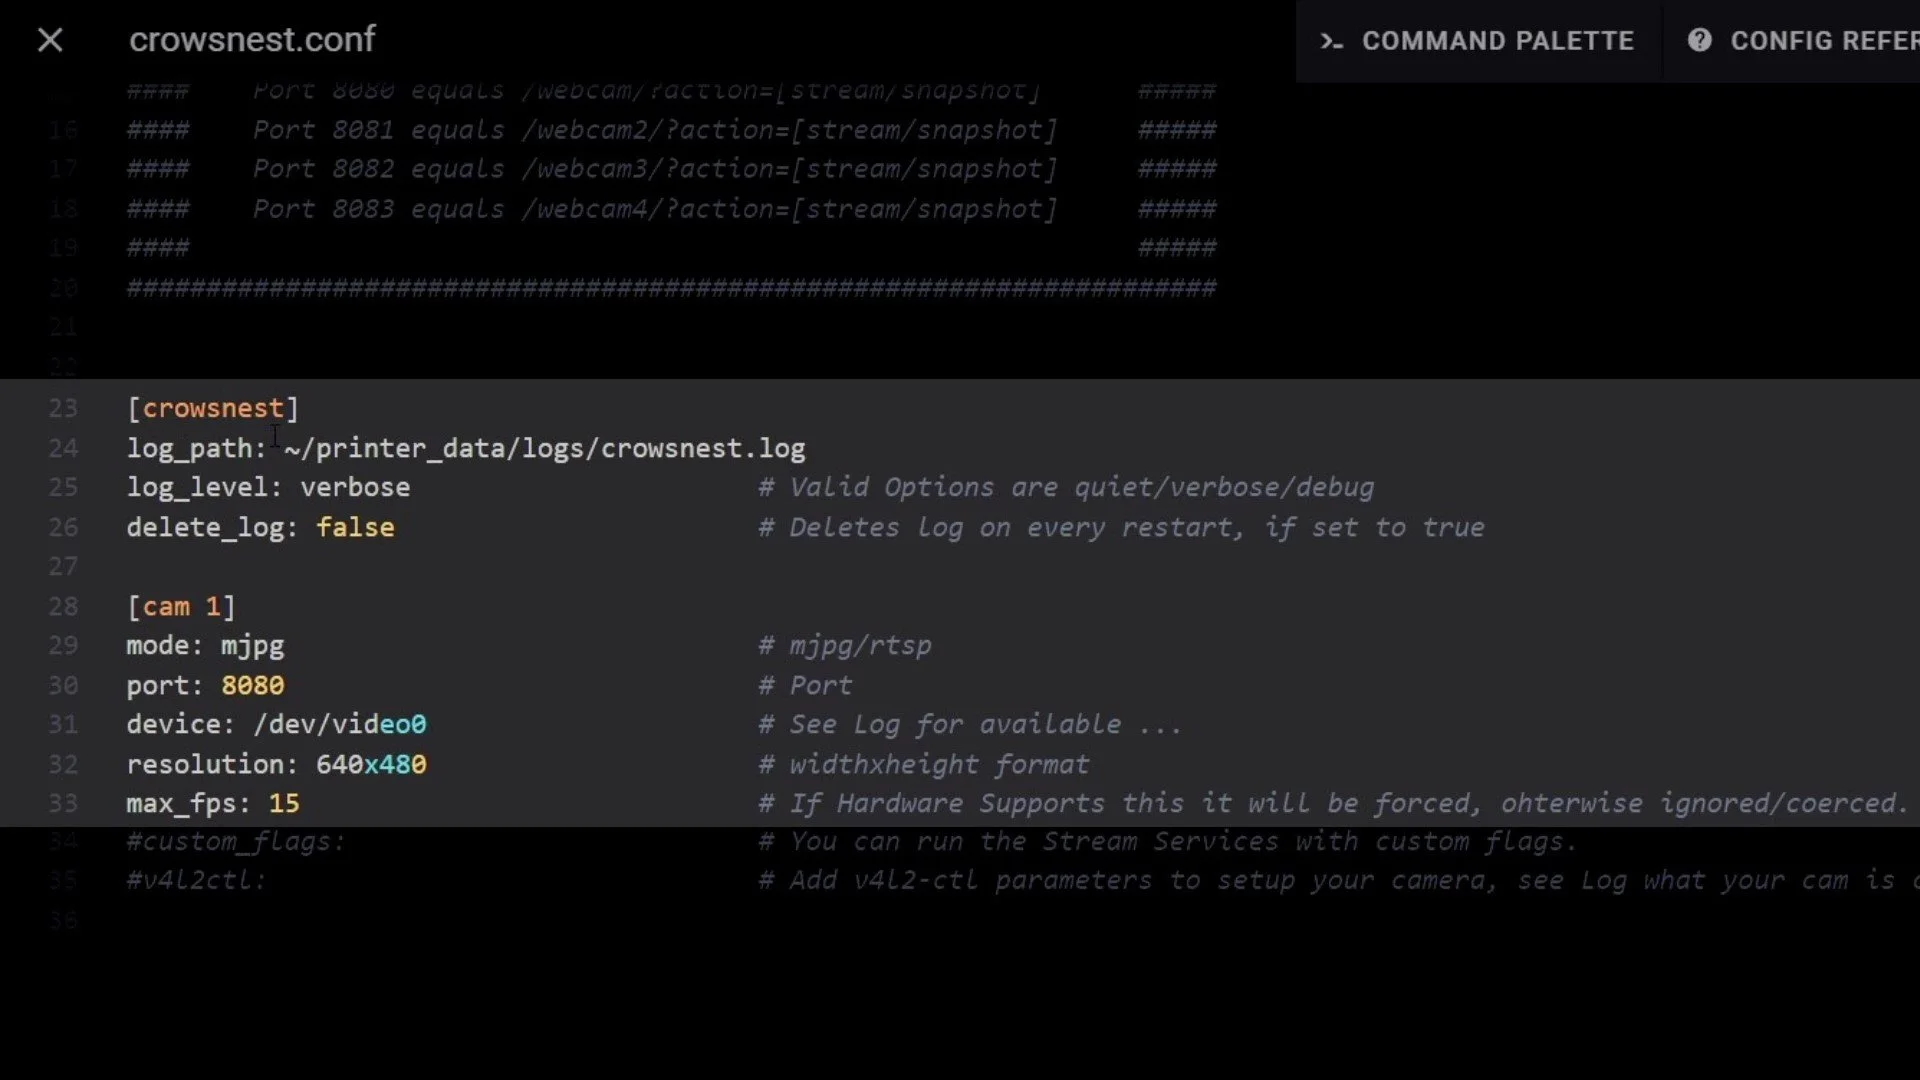
In general the only aspect of this file you will likely need to change to get started is the ‘device’ section, where you will input the address for your camera. The other sections require tweaking as you see fit. Each of these sections work in the following way:
[crowsnest]
section name, it should not be changed
log_path:
this is the location where the crows nest logs will be stored. In my above example the location is within the ‘printer_data’ folder, then from there the ‘logs’ folder. Which are all housed on your MCU
if you needed to take extra steps to get crowsnest working then you will also need to alter the log_path to suit your needs:
older Klipper/Moonraker (single and multi) : ~/klipper_logs/crowsnest.log
newer Klipper/Moonraker (multi) : ~/printer_1_data/logs/crowsnest.log
log_level:
when viewing logs this will determine the amount of information you will be given. Amounts from minimal to voluminous are as follows: ‘quiet’ , ‘verbose’, ‘debug’ Besides troubleshooting information they will also have the values of the settings for your camera (i.e. brightness, gain, zoom)
[cam 1]
name of the camera and it can be changed to anything you like, but the prefix cam(and a space) must remain intact (ie’ [cam logitech], [cam raspiCam])
mode:
this option allows you to pick your stream service. The options are: ‘mjpg’ and ‘rtsp’ when using ‘rtsp’ you will need an external viewer like VLC and will have no preview in your browser. It’s recommended to use ‘mjpg’
port:
this is the port controlling the webcam. For both Mainsail and Fluidd they begin at 8080 and increment up one port for each new webcam. i.e. the first webcam would be found at 8080, the second at 8081, then 8082, 8083
device:
Insert the address for the camera instance this will use. Crowsnest is built to turn the full address of the first camera to - /dev/video0 - Each new camera would be given a different video number which will not necessarily be in order (i.e. /dev/video4 , /dev/video2)
If those general names will not work you can find the specific device id in one of two ways:
SSH into the host device and run the following line(while the camera is plugged in)
‘ls /dev/v4l/by-id’
the return of the command lists all available devices, and will return a result similar to the following:
‘/dev/v4l/by-id/usb-PixArt_Imaging_Inc._USB2.0_Camera-video-index0’
usually a device will have multiple ids. Use the address that ends in ‘index0’
If you are setting up two cameras that are the same or similar you will likely get the same id for both. To make this work you will need to run a different command:
‘ls -l /dev/v4l/by-path’
This will return a USB specific address. Use the addresses that end in ‘index0’ for each different camera
Keep in mind finding the path this way ‘locks’ the address to the specific USB port it is plugged into. If you move the device to a different USB port the id will change and you’ll need to run the above command again.
Check the crowsnest.log for available devices
the section ‘log_path’ dictates where the logs can be found.
If the log cannot be found on your front end under the configuration tab it will be necessary to SSH into the host device using WINSCP
Find and enter the folder named ‘printer_data’
Within this folder open a folder named ‘logs
Inside this folder should be a file named ‘crowsnest.log’ double click that file to open it up in text form, then read through it for the section where it denotes available devices and copy the id from there
*Important reminder
Whenever you make a change to crowsnest.conf you need to restart the CrowsNest service. You do that by using the “Save and Restart’ button at the upper portion of the crowsnest.conf file. If you do not restart the CrowsNest service changes may be saved but will not be implemented, which can cause you headaches while trying to sort out your configurations. Please use Save and Restart.
Adding the Camera Viewer to the Home Screen
At this point your camera should be working, only you can’t view it yet until you add a camera option to your front end. To add one find the ‘Settings’ cog and click on it. From this menu find the option ‘camera’ and click on that. You will be brought to the camera portion of the settings tab. Within this section is an option to ‘Add Camera’ click on it and another menu opens up with options for the given camera. All of these parameters are being dealt with within ‘crowsnest.conf’ so we don’t need to make any changes here, but you will need to add a name (the name is only for your identification purpose, it does not need to match the name in crowsnest.conf). When finished click the ‘add’ button to create the camera.

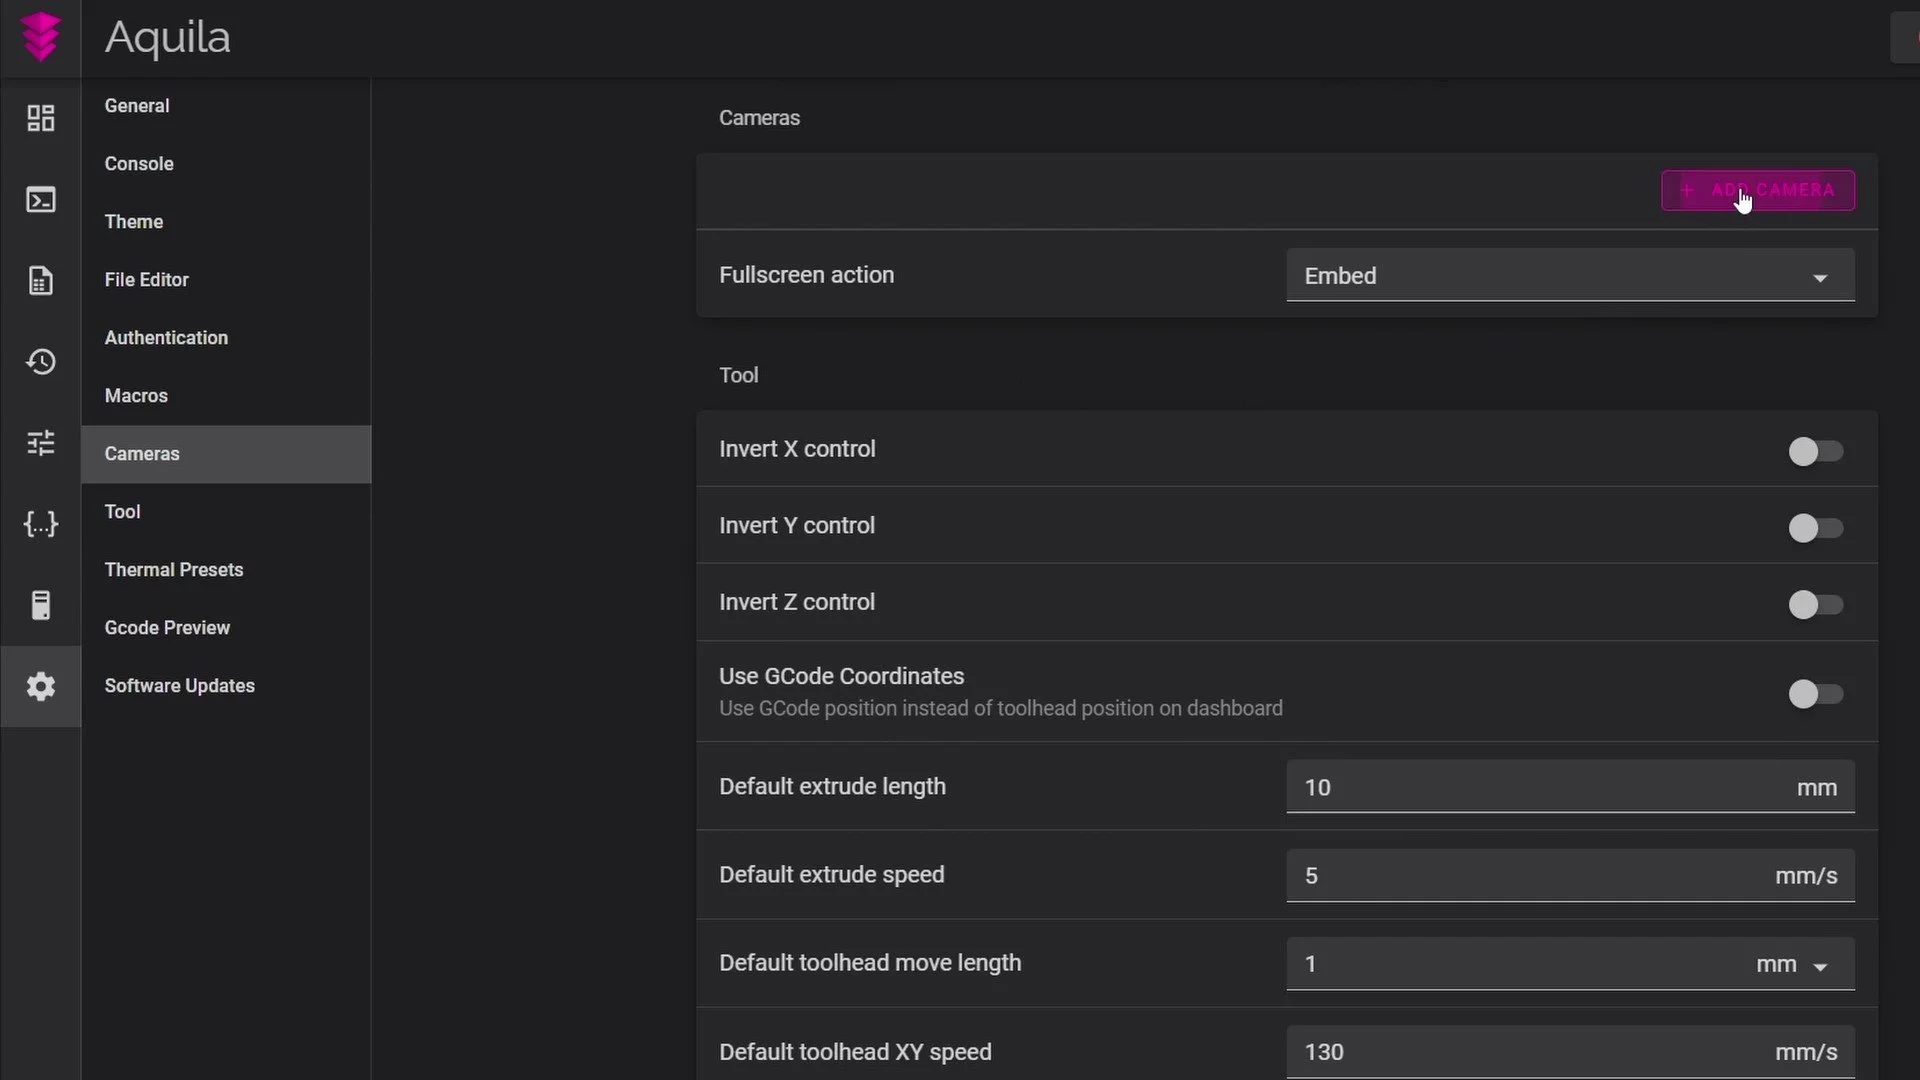

Back on your Home Screen a camera section will have been added and, hopefully, a stream is already up and running!

That is all it takes to get a camera to monitor your 3D printer using CrowsNest! If you are at this point and still do no have a camera feed them you will have to go back and do some troubleshooting. My guess would be the device address in crowsnest.conf is incorrect. The fix is relatively simple, just follow the steps outlined in the device section above (crowsnest configuration). If that still doesn’t do it you can always check in your crowsnest.log for the issue. If all of these attempts are fruitless feel free to stop by the Discord(click the discord logo at the top or bottom of this page) or send me an email! and until next time…
Keep On Printing!

Affiliate product section
I am an Amazon associate, and as such, any time someone purchases a product through a link I share Jeff Bezos drops a quarter of a penny into a bucket somewhere and it eventually finds it way to me (or something like that). Some kind souls have asked for a section like this so that they can help me and help themselves all at the same time. I appreciate that. So below our some products related to this article for that purpose. Thank you!